

It’s time to cook up some pizza!
And not just any pizza…
Sourdough Wholegrain Spelt Pizza: One that is not only incredibly tasty, but gives you all of the ancient grain’s nutrients and is good for your tummy.
That’s gotta make you smile, right?
I always smile when it’s pizza day in our house, making this is such a joy. I hope it will become that for you too.
My pizza process has been developing for the last 2 years, through many different ovens, methods and tools. What follows is the best way I’ve found to make a thin Italian-style pizza with a crisp bottom and an airy dough using wholegrain spelt and sourdough. As you’ll see, it involves particular equipment. If you don’t happen to have this, you can still make the recipe – be sure to check out my alternative options at the bottom of the post.

Sourdough Wholegrain Spelt Pizza
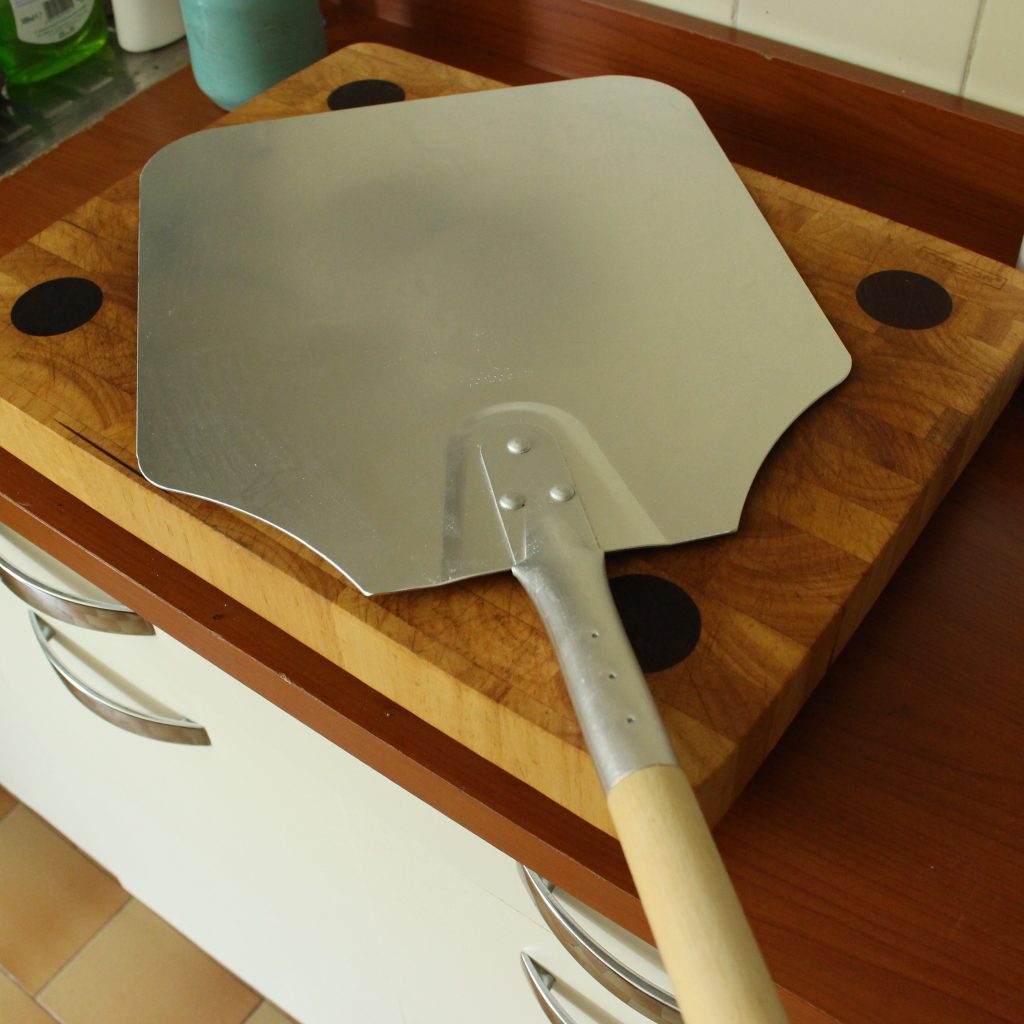
The ingredients and process below are based on local Italian pre-ground wholegrain spelt flour, my own active sourdough starter, an ambient kitchen temperature of between 22-27C (72-80F), an electric oven that goes up to 300C (570F), a round 35cm pizza stone and a metal pizza pusher (referred to by the Italian name pala).
The closer you can get to this set-up, the closer you’ll get to replicating what I create.
That doesn’t mean you need to have everything I have.
Study the pictures and video I’ve included – try to make your dough look the same. And check out my alternative tips at the bottom of this post.
Ingredients:
This pizza feeds 3 with salad in our house for a main meal. It fits on a 35cm pizza stone.
270g wholegrain spelt flour
4.5g salt
54g of active sourdough starter at 100% hydration (check below for help on this if you need it)
130g water
2 tbsp olive oil, plus extra for lining the bowl
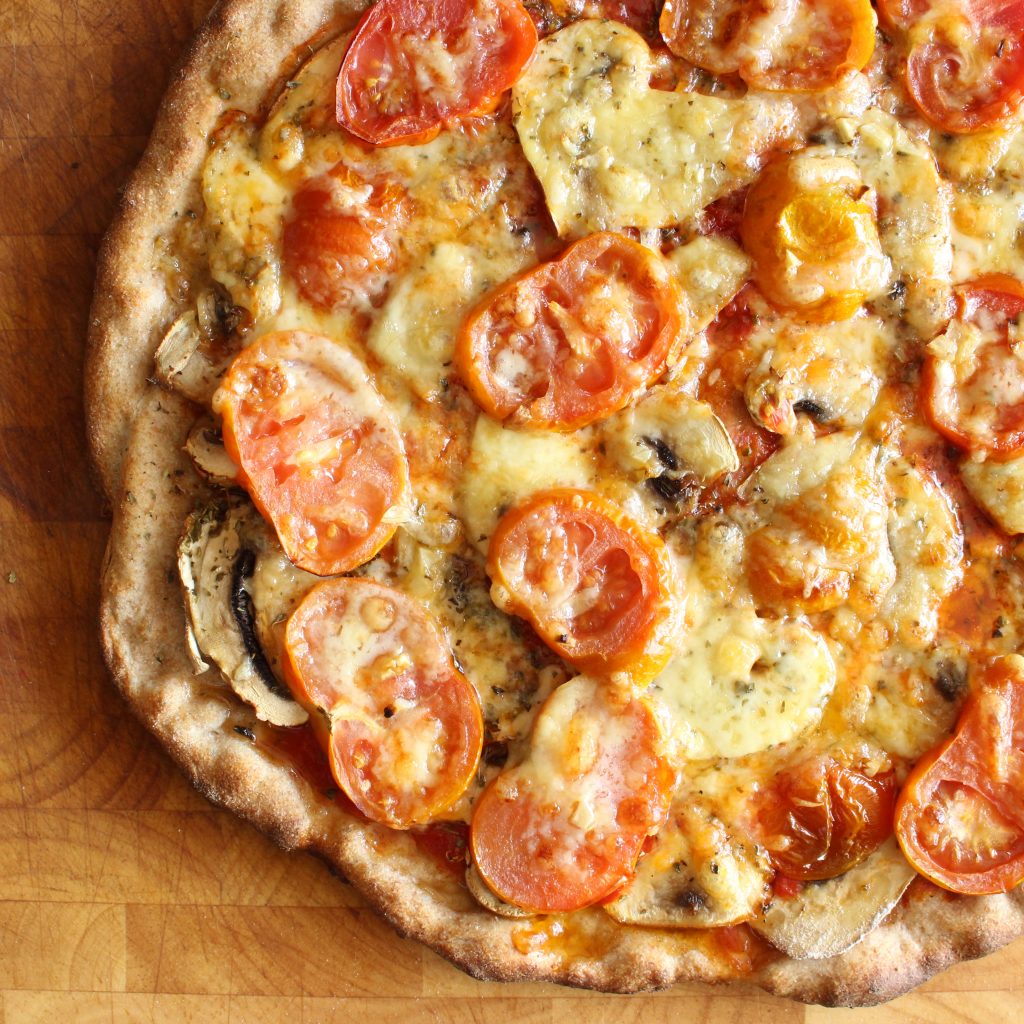
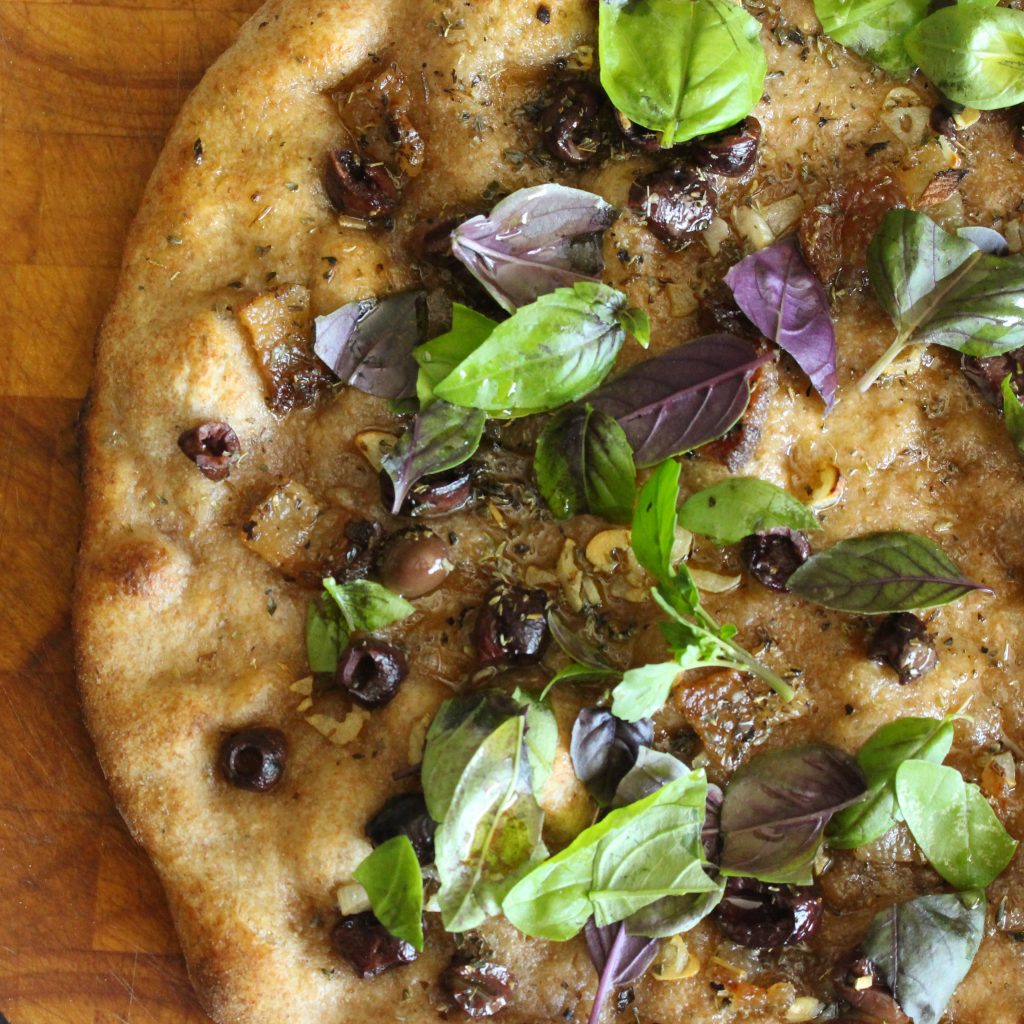
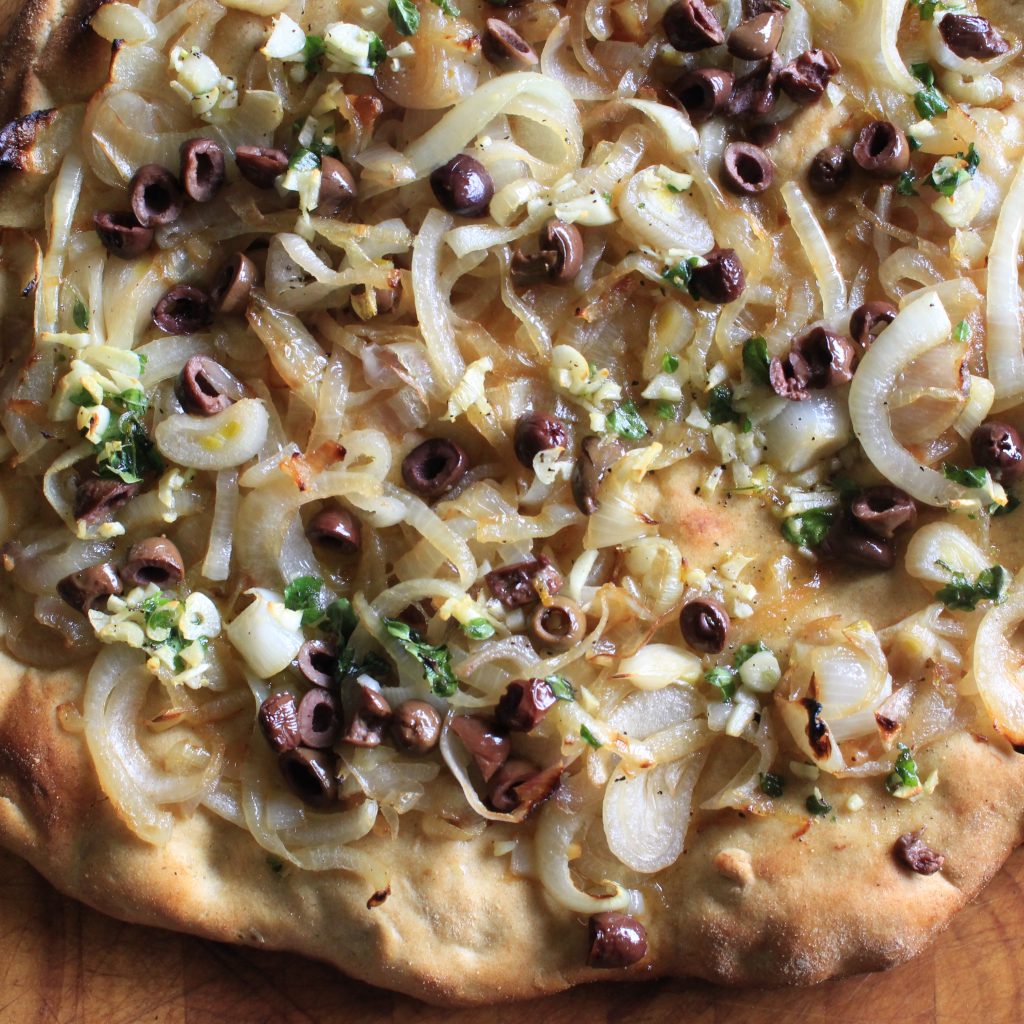
Toppings: My suggestions include tomato paste, onions, mushrooms, bacon, lardo, olives, fish, sausage, cheese and fresh herbs.
Let’s look at each of these ingredients:
Spelt Flour
Wholegrain spelt flour is needed for this recipe; my experience is that the better flour you can afford the better the pizza will taste.
Every flour is different and that affects the amount of water it needs and the speed at which it rises. I will show you how your dough should look and feel to try and help counter our flour’s differences.
Salt
I use local sea salt, finely ground.
Sourdough starter
Your sourdough starter needs to be active. Pull a bit of your storage starter off and mix it with equal amounts of flour and water (a.k.a 100% hydration) to build a leaven for this pizza.
I most often use wholegrain spelt for this starter, but have often also used wholegrain rye and the results are just as good.
If you need help building a sourdough starter, I have a guide here, or you can download my pay-what-you-want course Make & Maintain a Rye Sourdough Starter here.
Water
This should be non-chlorinated.
Olive oil
This gives flavour and a good consistency to the dough and you’ll use it to line the proofing bowl to avoid sticking.
Toppings
Traditional Italian pizzas have fewer toppings, not more. If you overload your pizza, it’ll go soggy. I recommend being sparing – this dough tastes wonderful and it’s a joy to bring out its flavour, not smother it.
My favourite is sliced pre-fried onion, sliced lardo, olive oil (into which I chop fresh oregano and garlic), black olives. I then add fresh basil just before serving.
Another option is pre-cooked sausage slices and mushrooms.
Tomato paste works well with pre-cooked onions and fish or for something meaty, with mushrooms, pancetta and pecorino.
This pizza always benefits from a generous drizzle of olive oil before bringing to the table.
If you want to use mozzarella, take it out of the fridge at least half an hour before putting it on the pizza, drain and slice it, then leave it to sit. It will give off liquid which is much better drained away than soaked into your pizza!
The process:
The dough for this pizza is started the evening before you want to eat. It stays in the fridge overnight, and will give you a pizza you can eat at lunch the next day.
The evening before:
Measure the flour and salt into a bowl and mix together.
Add the sourdough starter (which should be active and at its peak), water and oil to the dry ingredients and mix with your hands. Work the dough well, getting it as smooth as possible and letting the heat of your hands penetrate it.
My pizzas got a whole lot better when I let my 6-year-old son do this bit. He happily sits there for half an hour working the dough. If you have the time to give it this sort of love, it will make a difference to the result.
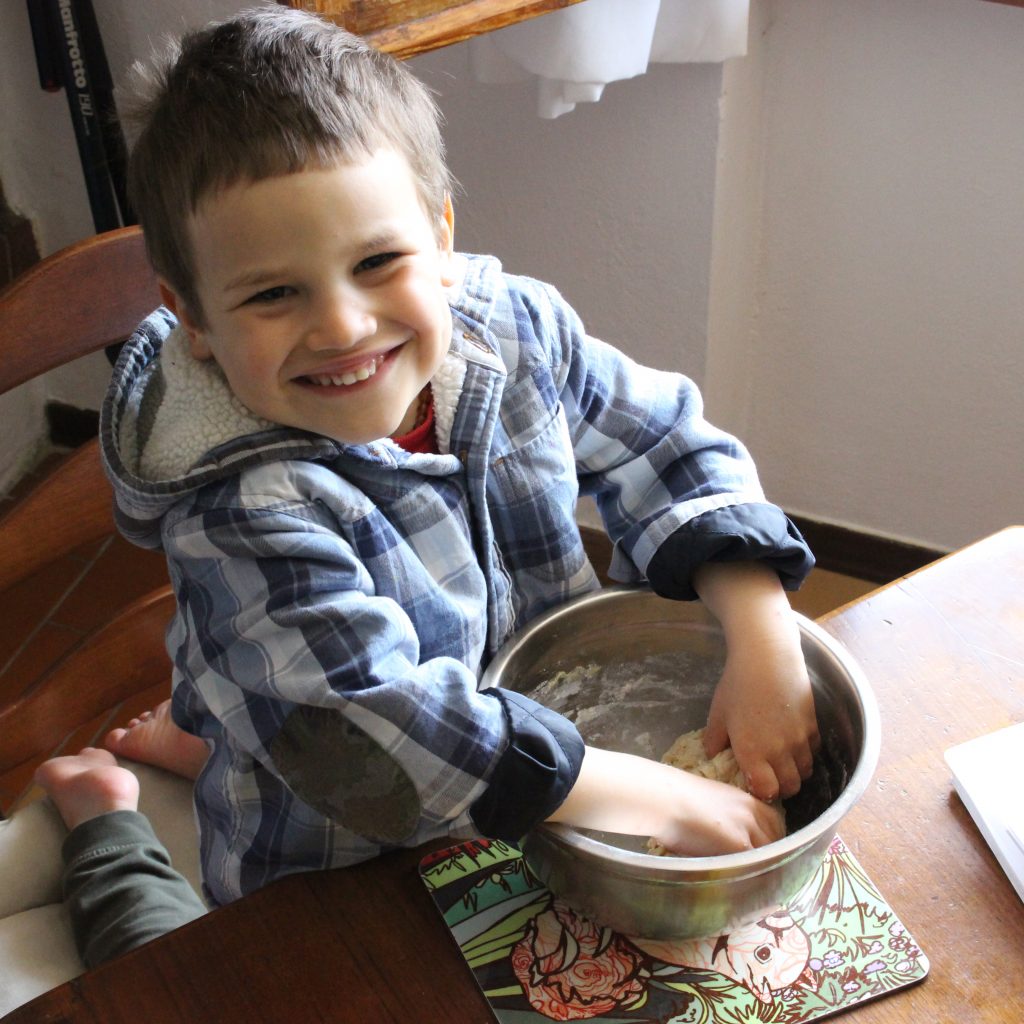
Try to get your dough looking like this:
When the dough is well worked, spread a little olive oil onto the sides and bottom of the bowl and place your dough back into it. Cover it well (with a tight plate or clingfilm) and leave it out on your kitchen counter (ideally at 22-27C (72-80F)) for an hour or two before transferring to the fridge overnight.
Pizza day early morning:
Remove the bowl and dough to your kitchen counter (ideally at 22-27C (72-80F)) as early as you can.
Set a timer for 60 minutes.
Every 60 minutes take the dough from the bowl and stretch and fold it 2/4 times until you feel the gluten network tightening and it resists you.
Here’s how I stretch and fold my dough:
Depending on what time you get up, you may get to do this 4-6 times before you bake it. As the morning goes on, you should notice it becoming more airy. Be gentler for the later stretch and folds – the dough will be more delicate.
Pizza day late morning:
Place your pizza stone in the oven (I put mine very close to the bottom) and preheat it and the oven to 300C (570F) for an hour.
Prepare your choice of toppings. Get them completely ready and in easily accessible bowls. When you top the pizza, it needs to be quick!
Sprinkle a chunky flour on the surface you intend for shaping the pizza and on your pizza pala.
Take the dough from your bowl. It should be pliable and airy. Place it on your floured surface and flatten it with the heal of your hand. Then shape the dough into a c.30cm circle. Do this using a mix of fingertips gently pushing the dough outwards from the centre and lifting the edges of the dough up and gently pulling them outwards.
Here are two videos showing me shaping a pizza:
Lift the circle of dough and place it onto the floured Pizza pala.
Working quickly, top the dough whilst also regularly shaking the pala slightly, to avoid the dough sticking to it. (It really helps to have two pairs of hands at this point.)
When topped, get the pizza into the oven by shunting it from the pala onto the preheated stone.
Carefully watch the pizza to gauge when it is done. It will take around 8 minutes.
Once done lift the pizza out and place on a cutting surface. Drizzle with extra-virgin olive oil and sprinkle with fresh herbs.
Don’t have all the things I talk about in this process? Check out my suggestions below:
If you don’t have a house that is 22C+ (72F+), try to find a spot that is this warm and keep your dough there. Check out my posts How to Keep Your Sourdough Starter Warm and How to Build a DIY Proofing Box for ideas.
If you don’t have an oven that’ll go to 300C (570F), preheat your oven and pizza stone to the highest temperature it can manage and increase the cooking time. With trial and error you’ll find how long this pizza needs in your particular oven.
If you don’t have a pizza stone, you can bake this pizza on a standard baking tray in a lower temperature oven. It will not get the crispy base that a stone can give you, but it’ll still taste wonderful.
If you don’t have a pizza pala it can be tricky to transfer your dough onto a preheated stone. You have several options:
- Shape the dough on a piece of floured greaseproof oven paper, put the dough plus the paper onto the stone.
- Take the fully preheated stone out of the oven, lift the shaped dough onto it and then quickly top it here, before placing the stone and pizza back into the oven.
- Lift the untopped dough onto the preheated stone and cook it for 2/3 minutes, before removing it with a fish slice (or two) and topping it, then returning it to the stone.
More pizza and sourdough resources:
The Ancestral Kitchen Podcast has a whole episode dedicated to pizza, plus other episodes on sourdough.
If you want to learn a clear and simple way to make and maintain a sourdough starter, check out my pay-what-you-want course here.
Bring ancient grain baking into your kitchen!
Download my free 30-page guide with five healthy and tasty 100% ancient grains recipes.
Thank you for the recipe! It’s the best pizza I have ever eaten!
Thank you Lucy. I love the picture and how you’ve managed to hold yourself back on the toppings to get the flavour of the dough. Also wanted to share that you did it without a pizza stone and without a pizza pala!, instead (as I know from IG!) using upturned cast iron pans and baking paper to transfer. Result!
Can I just double the ingredients to make an extra base to freeze and use at a later date?
Yes. That works well for me 🙂
Thank you for such a detailed recipe. My partners words: This is the best pizza you have ever made!
Im new in sourdough world and this will definitelly be our regular from now on. I made it with 50/50 wholegrain spelt and millet flour. I didnt have time to make it day after I put it in the fridge so it stayed there for 2 days but it was totally fine. One question: could you freeze the dough? Thank you again, wishing you a beautiful day.
Hi Ivana,
I’m so glad you loved the recipe. Thanks for telling me 🙂
Yes, you can freeze the dough. Take the air out of the freezing bag and seal well. Then you can defrost in the bag – mine slides out when I’m ready to shape, no problem.