


This post outlines how I make unhopped ale of the kind my female English ancestors did in their own kitchens until just a few hundred years ago.
Because, yes, ale was women’s work.
For most of history, the realm of fermented drinks has very definitely been under the control of women. And, up until the commercialisation of ale and beer (which started in the UK in the 1400s and took many centuries to complete), ale – the unhopped precursor to beer – was made at home, in a kitchen, by women. It was part of their household work, just like making bread was.
My ale is a replica of one from the 1200s or 1300s. It’s a ‘weak’ ale (as opposed to the ‘strong’ ale that was served to the wealthy and/or on special occasions) and I’ve based it on a recipe from Judith Bennett’s book Ale, Beer and Brewsters in England, interpreted by Tofi Kerthjalfadsson (his great article on it is available here).

The main differences between my interpretation and Tofi’s are that:
- I make ale with home-made yeast, not commercially bought yeast.
- I use pots and pans that I have around, rather than modern ones made specifically for brewing.
- I do not sanitise my vessels using a chemical solution.
These three differences make a different ale to my peers who replicate medieval ale whilst leaning on modern convenience. I feel strongly about them; doing it this way I am replicating what would actually have been done originally and I’m also trusting in the power and wisdom of traditional food ways to produce a beverage, as millions of people did up until the last few centuries. What did people do before Pasteur’s isolation of yeast cultures; before the manufacture of synthesised cleaning materials in a factory; before air locks? They made fermented drinks at home and enjoyed them!
This ale compared to modern beer
This ale is very different to modern beer, do not expect it to be like anything we call beer these days! It tastes different, it looks different, it keeps differently, it’s made in a different way and it uses home-cultured yeast.
This, being English (and, to a greater extent British) ale, it is also different to medieval continental ale. On the continent, hops were introduced to brewing much earlier than in the UK and the common pre-hopped ale – gruit, was heavily spiced and different to the usually plain UK ale.
Differences between this beer and modern beer:
- The flavour – it is not bitter, it is sweet
- The colour – it is opaque
- The viscosity – it is much thicker
- The strength – it is much weaker
- The yeast used – this is a home cultured yeast with diverse strains; I’ve not been able to test what strains are in it; in comparison laboratory yeast has one strain.
- When it is served – this ale was served fresh, still fermenting, or very recently having ended fermenting, unlike modern beer.
- Uniformity – because of the above, and because were making this at home each batch is different.
- The place in which it was made – this was made by women in their kitchens.
- The equipment – copper kettles, kitchen equipment, and sometimes barrels, no thermometers! These days brewers have hydrometers to measure the amount of sugar in the brewing liquid both before and after the fermentation. Medieval brewers did not have this. Because of this the technique is not so efficient.
- The sterilisation – every brewing book you read these days tells you to sterilise all your equipment with chemical sterilisation liquid; this was not done in the past.
- The process – this is a home process, done on a small scale, with human intervention every stage, hops were not used and there was no boil of the wort.
- The place it held in peoples lives – this was drunk multiple times a day, every day; though not necessarily because the water was bad (there is much debate on this topic among beer historians).
- The keeping qualities – this beer does not last. Bittering hops are antibacterial and keep bacteria out of the brew. As I don’t use these, the flavour of my ale is sweeter but also that the beer spoils more quickly; in addition I am not bottling to keep out oxygen (modern beers are bottled).
I see every one of the differences above as a positive thing. I love the flavour of this beer and I love the work involved in making it!
When did it all change?
The changes that saw unhopped, home-brewed ale being replaced by the bitter hopped, factory-made beer that we are used to today took place slowly, from the 14th century to the 18th century. They happened first in towns and cities, later in rural areas. They were initiated by the plague, and by the immigration of Flemish people to the UK who brought their hopped beer with them.
If you’d like to read about my journey of exploration to get to making this ale, plus learn more about earlier grain brews, home yeasts and why I brew this way, dive into this post or this podcast:

The Method:
Making ale has three distinct phases:
- Malt the grain (you can buy pre-malted grain)
- ‘Mash’ (infuse) that malt to make the wort (the liquid to be fermented)
- Ferment the wort
Disclaimer!! My recreation of this beer has, so far, been a three/four year exploration. Every batch is different – yours will be too. Each time I brew, I learn. Please understand there are many, many variables involved in brewing that can take a lifetime to master…and have fun!
Ingredients (to make three litres/quarts of ale)
1/ Grains for malting
(You’ll need 700g of total malt. This can be made, in my experience, from 850g of grain (prepare more rather than less to be safe).
I make my own malt and will detail how here. You can alternatively buy malt from a brewing supply company. It will need to be crushed, so if you don’t have a grain mill, buy it pre-crushed.
2/ Unchlorinated water
Water quality and ingredients make a huge difference to the end result. I am still exploring this. At this stage, it’s enough to say chlorine inhibits fermentation and you need to use unchlorinated water.
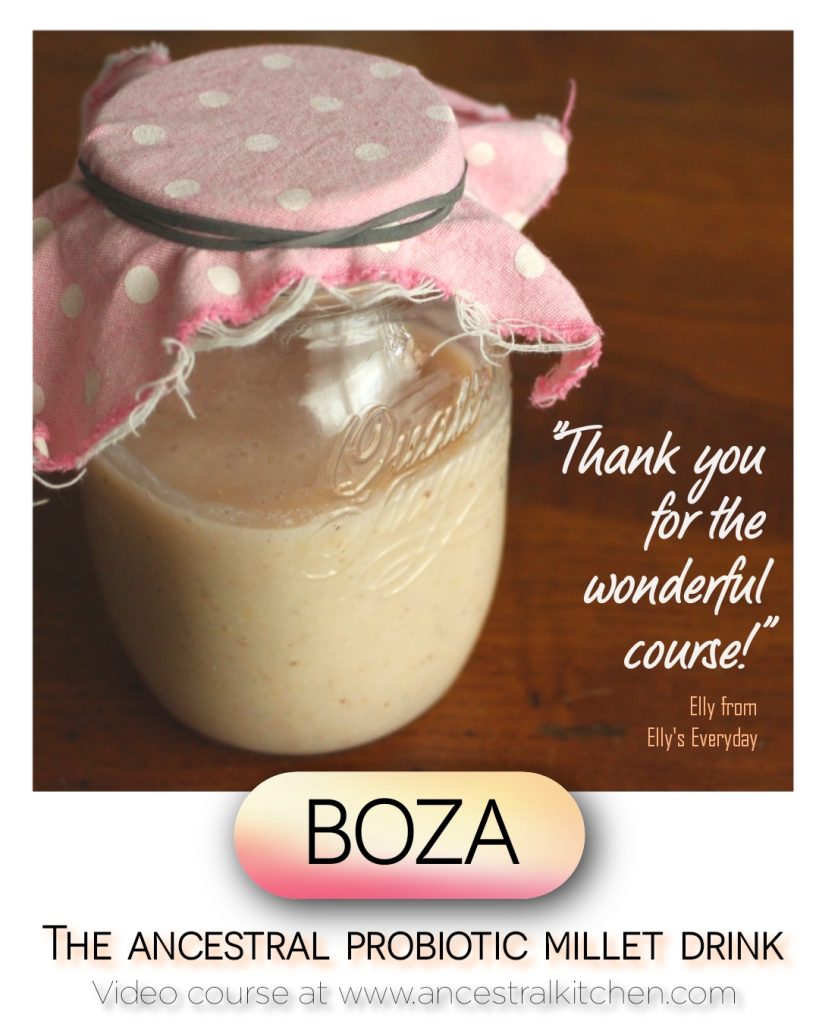
3/ Yeast starter
I use a robust home cultured yeast starter in the form of boza. You can access my course and make this for yourself here. I have also used rye bread kvass as a starter and also, on occasion, made a home-made yeast culture created with rye flour, salt (to inhibit bacteria), sugar (to encourage yeast) and a liquid made from boiling rosemary and water together (again to inhibit bacteria). If you’re interested in making your own culture, I’d suggest reading Lars Garshol’s Farmhouse Brewing Techniques.
Equipment
- 5 litre/quart fermentation vessel (with a lid)
- A heatproof surface to rest the fermentation vessel on (I use a breadboard)
- Towels big enough to wrap the fermentation vessel for insulation
- Clips (or a big elastic band) to secure the towels
- Thermometer
- Saucepan
- Scales
- Jug
- Wooden spoon
- Timer
- Bottles (for this amount I use three 1-litre/quart bottles)
- A funnel to fit your bottle necks
- A sieve/colander with bigger-than-sieve sized holes
- A fine sieve
- Making of malt also requires jars/gauze to soak and sprout your grain plus a way to dry them (a dehydrator is ideal, and oven is possible) and way to crush them (I use a handcranked roller mill, but an electronic grain mill will work too).

Timings
This ale takes time, especially if you are malting. Here’s an example of how a brewing/drinking session might go:
- Sunday night – soak grain
- Monday morning – drain and start grain sprouting
- Thursday and Friday – dehydrate malted grain (I do this in two batches as my dehydrator is not big enough for all of it)
- Friday pm – grind malt
- Saturday – make wort (malt infused water) for ale
- Saturday pm – strain grain from wort and pitch yeast
- Monday pm (or Tuesday am) – strain ale and bottle
- Monday pm till Thursday or Friday – drink ale!
In addition, if you are creating your own yeast culture, you’ll need to time it to coincide with your pitching day.
Malting
I malt my own grain for brewing. I recommend doing this from an authenticity/connection perspective, but it is time-consuming, so if you prefer, you can buy pre-malted grains from a brewing supply store.
What malting is:
Malting is soaking and then sprouting a grain so that starches are converted into sugars ready for the yeast in fermentation to use as fuel.
What grains you can use:
Any grain that will sprout! Traditionally barley was used, (it’s important to buy malting grade barley if you want to use barley because there are different types).
The grains I use:
I have rye in my kitchen all the time, so I naturally worked with that. I read later that oats were very often used medieval England and, because I had some that I knew would sprout (most oats don’t sprout) I decided to use them too. I use the quantity of oats that aligns with the amount used in medieval England. I have not used barley; it has been a hassle to source barley in Italy.
How to test a grain:
Make sure your grain will sprout before you try to do a large quantity. Very often grains are irradiated or left too long and won’t sprout. Test a small amount first (using the same process as below, but with a small quantity).
How to malt:
Soak your grain, ideally in a large unlidded glass vessel covered with a piece of gauze secured by elastic band, for 12 hours in ample unchlorinated water. Drain and rinse several times with water. Leave the container of grains at a 45° angle somewhere they can freely drain. Return to the container every 12 hours and rinse, agitate and drain two or three times.
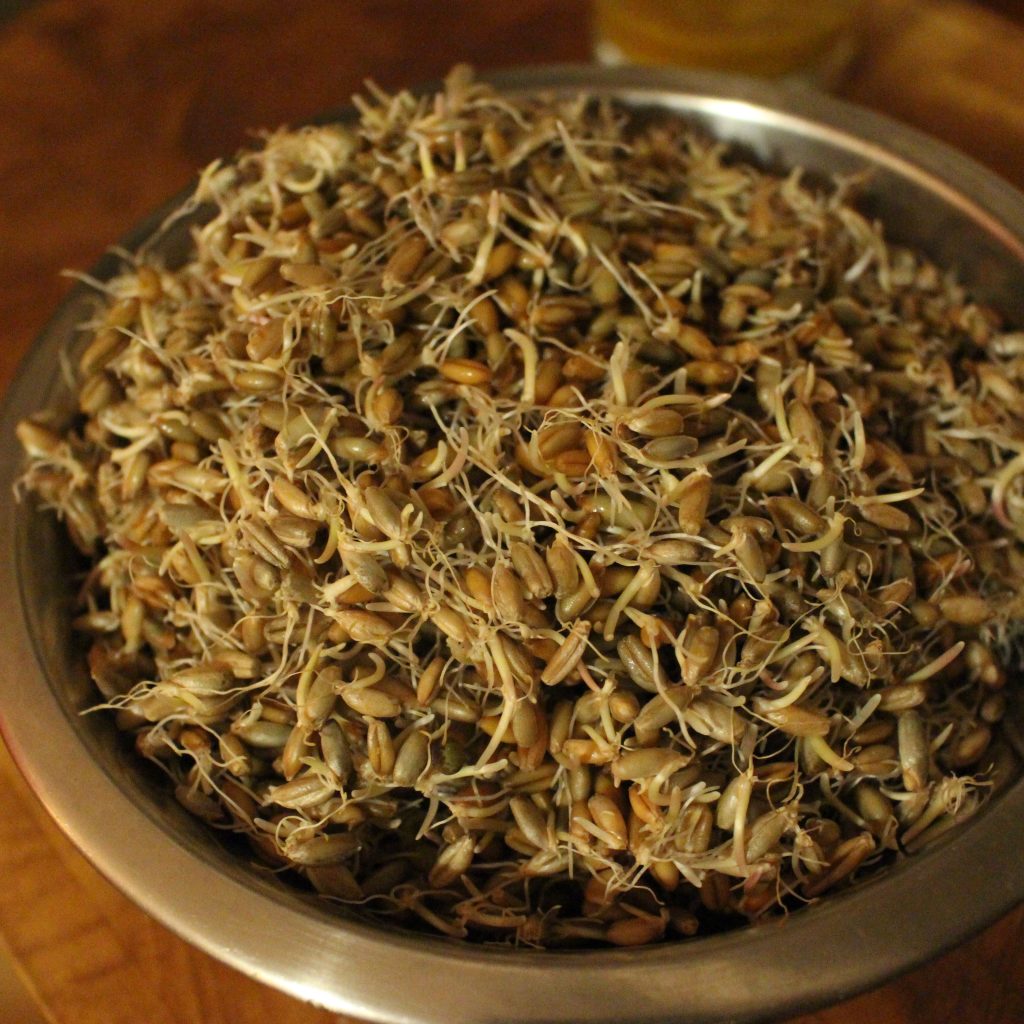
After a day or so you should see small white sprouts beginning to appear on the grains. Continue with the process until the majority of grains have sprouts that are a centimeter long.
There are people who have spent their entire life studying malting, judging when to stop the sprouts and when to continue them is something that we learn over time.
Dehydrating malt:
The malt was traditionally kilned in order to preserve it, make it easier to work with and, later, to bring out flavours in it.
I dehydrate my malt. Once it is sufficiently sprouted, I rinse and drain it well and then transfer it to a dehydrator at 50°C for around 12 hours until it is completely dry. It will keep like this for months and months.

Preparing the malt for use:
Two things need to be done to the dehydrated malt:
The tails need to be removed as best they can be (as they impart a bitter taste to the ale). The easiest way I have found to do this is to put a quantity of the malt into a wide tray (like a roasting tin) and rub handfuls of it between palms, agitating well. You should see the tails coming off. When it feels like you’ve removed the majority of them, put the results through a medium sieve to separate the tails and the malted grains. Discard the tails.
The malt needs to be crushed to allow easy access to the sugars in it. I do this by grinding it. I have found that if I spray the malt lightly with water to dampen it a few hours before grinding, I’m less likely to cause the grains to disintegrate into powder as they are ground. This works well for my style ale because it is not strained in the same way as modern beer therefore an overabundance of flour like particles will thicken it too much.


Mashing
This is the process of steeping the malted grain in hot water in order to extract the sugars from the grain into the water. Once this has been done, the mash is strained and the water (called wort) is then used for the fermentation.
-
- Prepare the vessel by warming it up (to avoid the shock of very hot water on glass) and wrapping it in a towel. Ensure it’s on a heat-proof surface.
- Boil 470 ml water and pour into the vessel from a height (the water is added from a height to cool it down before it hits the grain and to oxygenate it).
- Add all the malted, crushed grain.
- Boil 690 ml of water and pour in slowly from a height, stand for 10 minutes with the lid on.
- Boil 230 ml of water and pour in slowly from a height, stand for 20 minutes with the lid on.
- Stir it (it should be like thick porridge) and replace the lid.
- Leave for at least 90 minutes with the lid on (I often place a towel over the lid too)
- Boil 600 ml of water and pour in slowly from a height, stir, leave for 25 minutes with the lid on.
- Boil 920 ml of water and pour in slowly from a height, stir and replace the lid.

This mixture now needs to be left. Most grains mash well in a solution that is between 57°C and 72°C. I take the temperature of the mash over the hours after finishing the process and once it’s around 50°C I know that I can strain it.
The yeast can be pitched when the wort is that fermentation temperature, or slightly above. I’ve learnt to ferment my beer at 20°C, and therefore try to pitch the yeast when it’s between 20°C and 25°C.
Sometimes, if I judge it appropriate, I will leave the mash overnight to cool, and pitch the yeast in the morning.
Other times, if I think that’s going to be too long, but I don’t have enough time to let the wort cool naturally before bed, I will immerse the fermenting vessel in washing-up bowl full of water and ice blocks. It then cools down very quickly (taking it from 50°C to 20°C in just over an hour) and I can pitch the yeast.
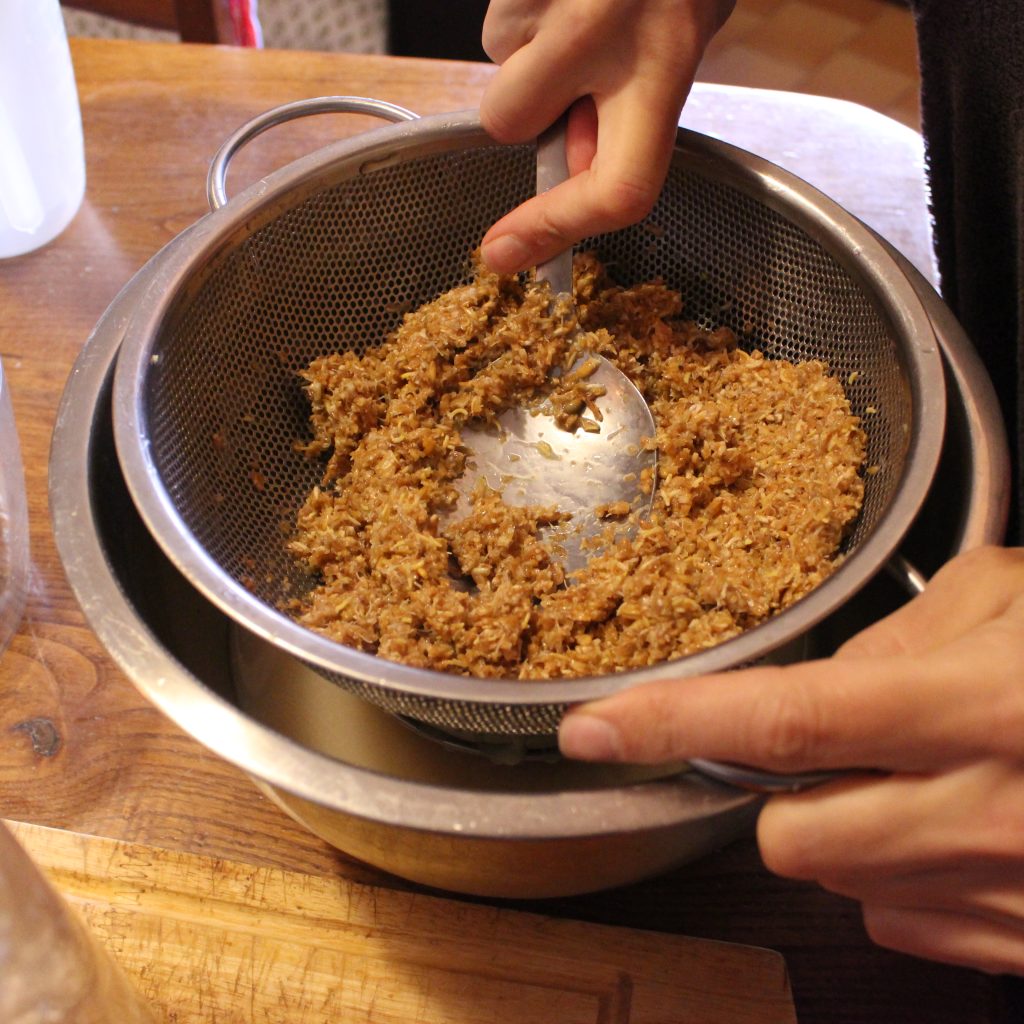
Straining the mash
Once the temperature of the mixture is below 50C, I strain the mash through a metal colander that has large holes, pushing down on the soaked grain in order to release as much liquid from it is possible. Some smaller parts of the soaked malt will go through the sieve, but I will then remove these during the bottling process, when I use a finer sieve.
I briefly rinse out the vessel used for the mash and return the wort to it for the fermentation.
It can be useful, at this stage, to taste the wort. This will give you a ground zero idea of what you’re fermenting, then, as the ferment progresses you can taste and compare the flavours.
Yeasts
What yeast would have traditionally been used in this ale:
A home-cultured, multi-strained yeast that would have been shared between brewers. Originally these yeasts would have been sourced from nature. Archaeologists have found that beers before 1 CE invariably included fruits and/or honey in them, possibly as the yeast. More recently there are stories that have been passed down of people ‘capturing’ yeasts and culturing them, in Scandinavia with rye flour, at home.
The diversity of multi-strains yeast cultures is astounding compared to single-strain factory-produced packets yeast. I remember hearing Lars Garshol (author of Farmhouse Brewing Techniques) saying that, compared to the total 150 commercially available single-strain yeasts, a lab, when testing kveik, a single yeast culture from farmhouse brewing, found over 280 different strains of yeast!
Types of yeast we can use:
We can culture our own yeast. We can do this by using ‘wild’ yeast (i.e. making a small amount of wort and leaving it out to collect organisms – as opposed to commercial ‘wild’ yeast which is collected from something in nature and then isolated in a lab). We can also do this by using a grain, a bacteria inhibitor (like herb or salt), a little bit of sugar and time – a bit like a sourdough starter.
I culture yeast regularly at home for other fermented drinks (like boza and kvass). These cultures are strong and I like to use them in my beer.
Fermentation
I pitch 150 g of the boza when the wort is at temperature. I stir it in well. I put the lid back on the fermentation vessel and I put it in the place where I wanted to ferment. I try to ferment at 20°C, in the summer this is harder, in the winter I use a home-made proofing box.
I came to 150g of boza (I use the same amount of rye bread kvass) through trial and error. I cannot easily translate this to your yeast culture as we don’t have access to laboratory facilities that would be able to test how much yeast there is in our home-made ferments.
I settled on 20°C as a fermentation temperature through trial and error. I have found, that when I do it at higher temperatures, the beer tends to produce a banana flavour much more strongly. This is a byproduct of the fermentation and can be produced in high quantities when the yeast is more stressed. Yeasts can be stress for many, many reasons: the water is not the right pH, the water has the wrong balance of minerals, the water doesn’t have enough oxygen in, there’s too much yeast in the mix, there’s too little yeast in the mix, the temperature is too high, the temperature is too low, there are too many sugars available, there are too few sugars available, the fermentation is left too long. So many! It is the work of a lifetime to hone this process.
For my ale I generally leave the fermentation 2 to 2 1/2 days.
What happens during that time:
It takes a while for the fermentation to get going, but after 12 hours you’ll start to see a head (called a kraussen) forming at the top. This is made up of larger particles of the wort and byproducts of the yeast and is great because it forms a protective barrier between the fermentation and the air (which could potentially bring in a lot of other bacteria to the mix).
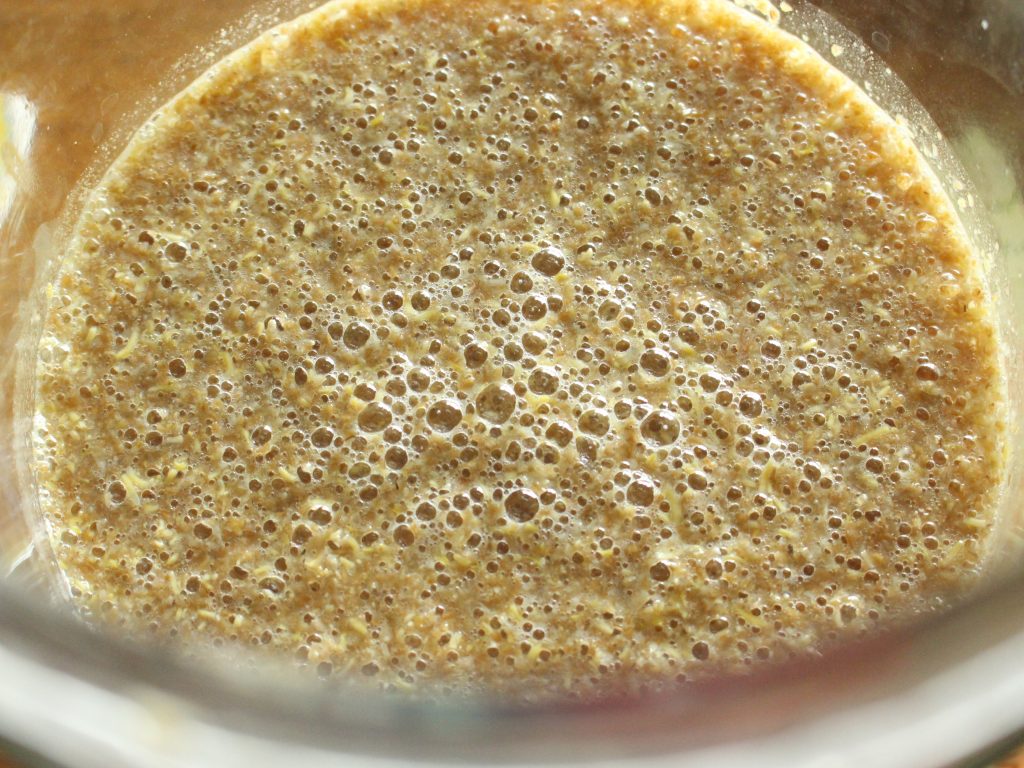
If you watch the fermentation (through a glass container) you will often see, as you do with other ferments like water kefir, particles moving up and down in the wort and also bubbles appearing and popping on the surface.
Try not to disturb the fermentation too much during this period. Don’t move it and don’t stir it.

After two days I taste the ale. Through experience I have come to know what flavour is best at the point of stopping the fermentation. This fermentation is stopped much earlier than modern beers; it is served fresh or still fermenting. Generally, if the mix has lost most of its sweetness and is tasting beery, I will end the fermentation.
Straining and second flavouring
I then strain the ale into bottles. I use a much finer sieve for this than the one I used to strain the wort before fermentation.
I use glass swing-top bottles. Some caution must be applied to the use of these, because the ale, still fermenting, is likely to off-gas and if you are not very careful in your monitoring of it, a bottle could smash.
Some swing-top bottles have much tighter seals than others. If you’re using glass bottles get to know your bottles and check the ones that have a tight seal regularly, burping the beer. If in any doubt, leave the swing-top bottles open during the long overnight stretch, especially at the beginning of the ale’s life.
If you are unsure about using glass bottles, you can instead use plastic bottles that will expand with the production of gas see you can actually see whether they need the top unscrewing to release this gas.
Sometimes I add flavour and or extra sweetener to the second ferment. The extra sweetener gives the beer a carbonation (although I usually bottle it whilst it still has some fermentation activity happening, so this carbonation happens naturally in the bottle if the seal is tight). Flavouring gives the beer an additional dimension. I’ve used many spices, my favourites being caraway, cinnamon bark, anice and fennel. I also sometimes use redbush tea.

I usually leave these bottles out for around 12 hours, checking the level of remaining fermentation, then I’ll transfer them to the fridge.
Drinking
The ale lasts 4-5 days in the fridge. It’s character changes over that time, and it is mostly best around the second day.
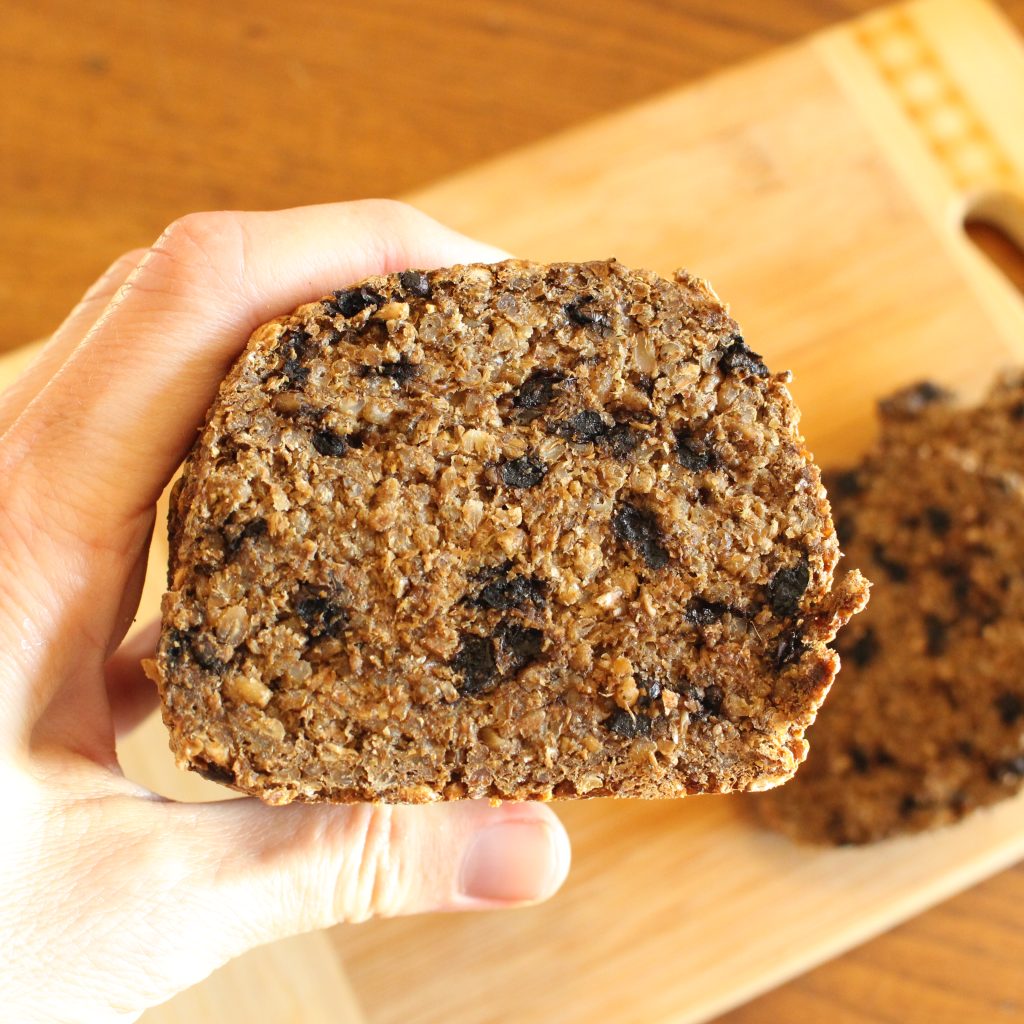
Making bread with the spent grain
The spent malt grain strained out from the wort before fermentation is sweet and can be used to make breads with.
I have experimented with several recipes that use a large percentage of this waste malt in them – a rye with spices and molasses has been my favourite ’special’ loaf so far. I also very often simply use the malt as a 10% by weight addition to loaves.


This ale-making process (with home-cultured yeast, kitchen equipment, no sterilisation and open fermentation), is not something I’ve been able to find anyone else doing. If you’d like to engage with it, to try it, to move it forward, I’d love it. Please do talk to me – comment here or mail me at alison @ ancestralkitchen.com and let me know!
Bring ancient grain baking into your kitchen!
Download my free 30-page guide with five healthy and tasty 100% ancient grains recipes.
Hi! I am very interested in trying this process for myself and bringing medieval Ale into my
home kitchen. I’ve recently purchased your Boza course and have a starter culturing in a warm space.
I’d like to know, once you’ve added in the yeast do you strain the mash immediately or do you let the mash and pitched yeast ferment in the wort for a time before straining?
Hi Jeanine,
I’m happy to hear you’d like to give this a go.
The mash is strained before pitching the yeast. I strain this when the mix has cooled to about 50C. I then leave the wort to further cool until it’s about 20C before pitching the yeast.
Let me know how you get on.
Alison
Hello! I’m going to be trying this in the next few days! I have a question though. For steps 5, 8 and 9 of the mashing process, should the water be boiled first like in the previous steps, or should this water just be poured from height at room temperature? Also, do you know what pH makes the best ale for you? I live in Texas so I’d imagine our water supplies are very different, but I could pH adjust my water if needed.
Thank you for sharing this recipe! I’m so excited to try some medieval ale!
– Jessica
Hi Jessica!
Thanks for questioning the mash steps. Yes, the water should be boiled. I’ve amended the post to specify this.
I know that water pH can make a huge difference to ale, but I’ve not tested this so far in my experiments. I would love to know any conclusions you come to!
Are you making your own malt?
Hi Alison!
I did not make my own malt, I bought the grain already malted and ground from a brew shop. I’ve tried this twice now with barley and it was really good! I’m going to try either a wheat/barley blend or try adding herbs to my next batch.
I was wondering if you would mind sharing any sources you used to come up with this historic recipe? I found a paper from a historian in 1998 (https://www.cs.cmu.edu/~pwp/tofi/medieval_english_ale.html#:~:text=In%20medieval%20England%2C%20ale%20was,Virtually%20everyone%20drank%20ale.) who had a similar process, but I’ve been unable to find any primary sources that contain a recipe so far. I’m getting my masters degree right now, and I want to try to make my thesis related to medieval brewing in some way. I found some ‘historic Gruit’ recipes online but they use way too much equipment and scientific measuring to actually be historically accurate.
Thank you for this great resource!
– Jessica
Hi Jessica. I’m glad it turned out well. I don’t think there is anyone, aside me, not using modern equipment (at least I’ve not come across them) to make English historic ale. I recommend Judith M Bennet’s book Ale, Beer & Brewsters in England. She has primary source inventory records. Other than that, the ‘recipes’ I’ve found have all been post-hops.
Hi Alison,
I think you’re right! The paper I found also references that book, so I suppose that may be the only good source.
I’ll keep researching! I’ll let you know if I dig up anything exciting. This has been so fun 🙂
Thanks,
Jessica
Hello Alison, Stumbled across your website in the course of researching a chapter for my forthcoming book. The book is a sort of culinary journey down the Thames and I’m currently working on a piece about Southwark and the history of beer brewing. At the end of each chapter I include a recipe that relates to the chapter subject. In this case I want to include a recipe for home-brewed ale. Having read your blog on the subject I think it would be great if I could add your recipe (with credits obv) and a link to your wonderful site. Would this be possible? Sorry, can’t find any other way to contact you.
Hi Di!
What an exciting prospect reading your forthcoming book is! Thanks for getting in contact. I’ve emailed you, reply to that and we can chat.
Alison
Thank you for posting this! It’s very interesting and informative. I’m intrigued and may brew some. I got interested in medieval brewing while reading “Poet, Mystic, Widow, Wife: The Extraordinary Lives of Medieval Women” by Hetta Howes. On a whim, I thought I’d search for a recipe, and that’s how I came here. Thank you again!
Hi Tony, it’s nice to connect! Would you recommend the book? Let me know if you decide to brew some ale, it’s quite an experience 🙂
Yes, I would recommend the book. It’s well written and provides interesting insight into medieval women’s lives.
Thanks!