

There is something deeply steadying about a jar of home-rendered fat. It sits quietly beside the stove. It does not shout about omega ratios or trend on social media. It simply waits. And when you reach for it – to roast potatoes, to fry eggs, to rub into pastry – it performs beautifully, just as it has done for generations.
For most of human history, rendering fat was not a niche skill. It was simply what happened after butchering. Fat was carefully cut away, chopped, melted slowly and stored. Nothing was wasted. Fat meant calories. It meant flavour. It meant survival through winter.
Today, good-quality lard or tallow can be surprisingly expensive. Yet the process of rendering fat at home is simple, deeply traditional, and immensely satisfying. This guide will walk you gently through how to render pork lard and beef tallow using methods that would be entirely familiar to our ancestors.

Why Render Fat at Home?
To save money:
Eating ancestrally is touted as being expensive. That’s unsurprising when you realise that, for example, shop-bought tallow can cost upwards of £30 per kilogram (20USD per pound). Meanwhile, many butchers will sell (or even give away) back fat or suet for a fraction of that price – my experience is that home-rendered fat can cost as little as a tenth of the price of the shop version .
To get a real food product:
When we strive to eat real food, choosing vegetables and meat carefully, why would we ignore the quality of our fat? When we render lard or tallow at home we know where our fat has come from. We also get to potentially support a community food economy, buying from a farmer local to us.
To enjoy the delicious flavour:
Shop-bought lard or tallow is often made with fat that’s come through the industrial food chain. That, along with the fact that it is often hydrogenated (to extend its shelf life) means that it does not taste good. When you render fat at home, you get to use good fat and apply gentle heat only. The result is that it tastes amazing..
Cooking with home-rendered fat is a joy!
And finally, there is something less tangible but just as important — cooking with fat you’ve rendered yourself is a joy. Pastry, roast potatoes, cookies…they all take on a new dimension of wholeness when you know that you made the fat at home.
Understanding the Different Fats
Pork:
Pork fat, once rendered, becomes lard.
The fat from the pig’s back is most commonly used, though lard made with kidney fat — known as leaf lard — has traditionally been prized for delicate pastries because of its mild flavour. If you can access it, you can also render the fatty membrane surrounding the organs – this is called caul fat.
Beef:
Beef fat, once rendered, becomes tallow.
The fat from the cow’s back is most commonly used. The hard, crumbly fat around the kidneys of a cow can also be rendered. It is called suet when raw; once melted and strained, it is also tallow. Beef caul fat (which surrounds the organs) can also be rendered.

Though rendered fats can vary greatly, lard is generally softer and whiter than tallow. Lard can be spread from the fridge, whereas if you want to use refrigerated tallow you’ll need to break off chunks.
How to Render Fat at Home (Traditional Methods)
At its heart, rendering is simply melting fat slowly enough that it liquefies without burning. The ideal temperature to maintain during the process is around 104–121°C (220–250°F).
As a rule of thumb, lower and slower is always safer than hotter and hurried.
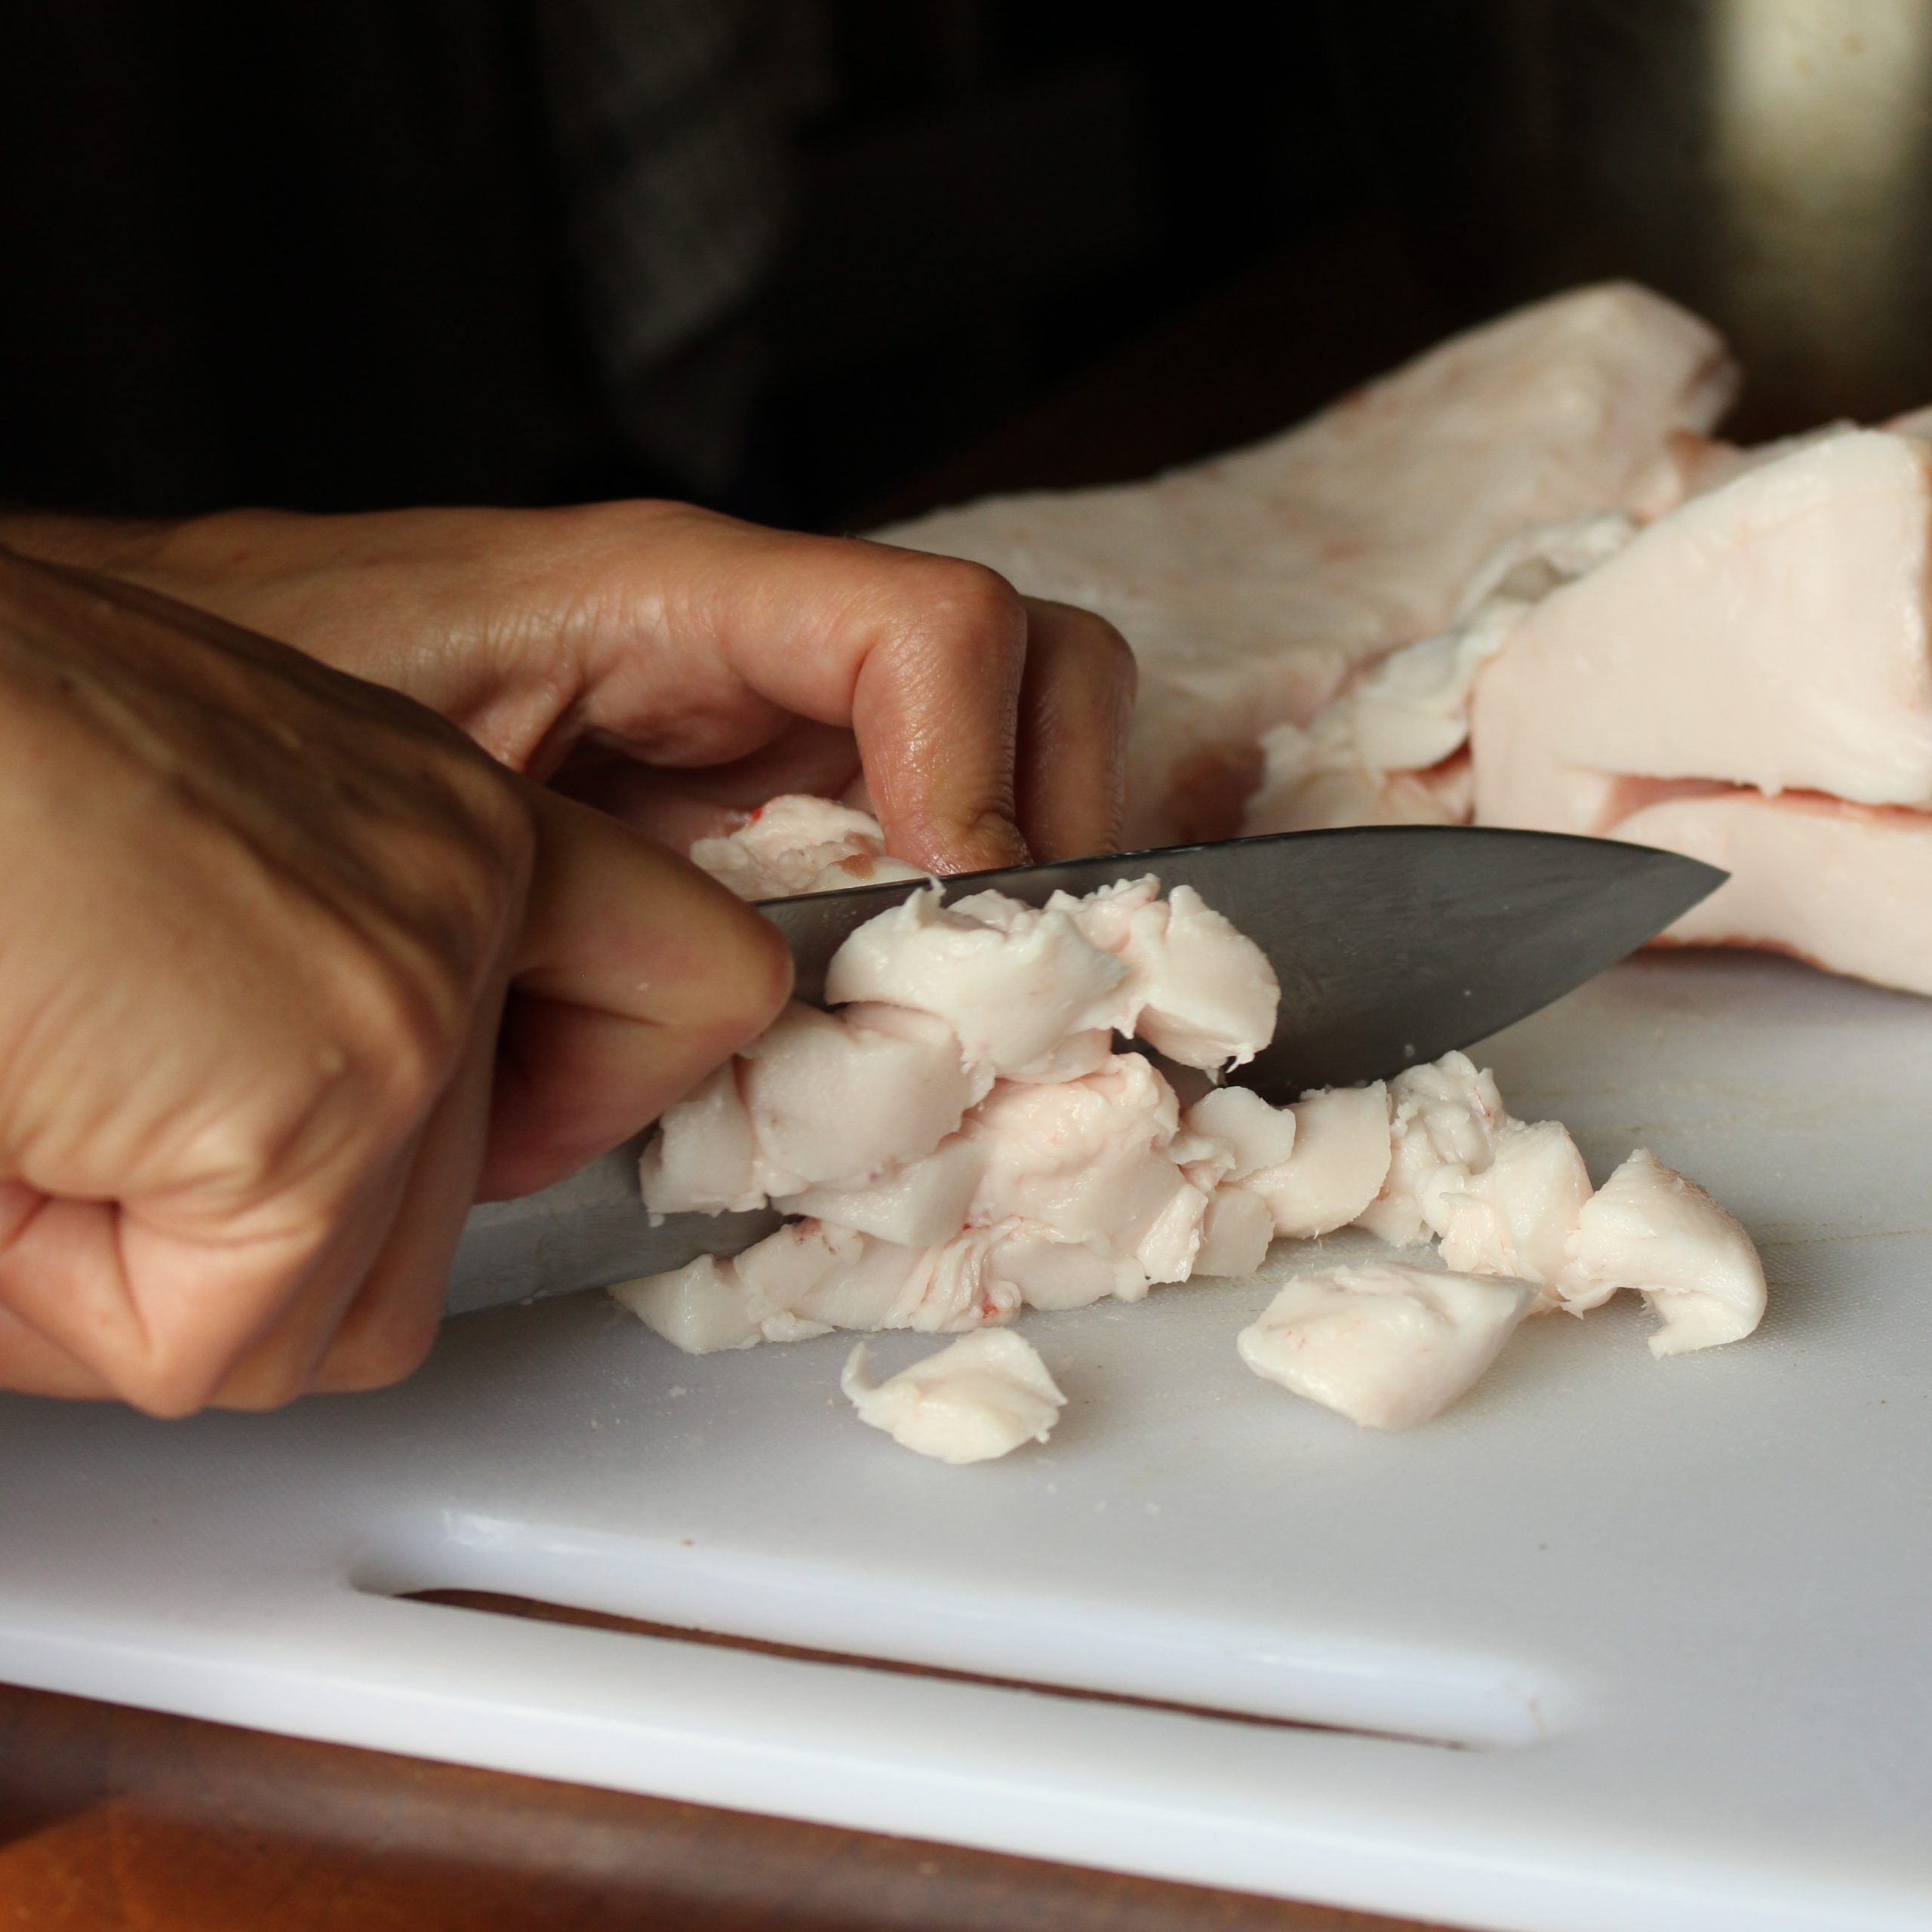
The First Step: Chop Your Fat
The smaller you can get your pieces of fat, the easier it will be to get the lard or tallow out of them – the heat will reach all the parts more quickly. So start by chopping the raw fat into small pieces. This can be done by hand, with a hand/electric mincer or even with the grating blade of your food processor. This is the most time-consuming part of the whole process (trust me, it gets easier after this!) – here are some of my tips for this stage:
- If you’re doing this by hand, use a sharp knife!
- If your fat still has a lot of meat attached and it’s hard to clean it up, consider using the wet-rendering method below as opposed to the dry rendering method
- Chill or partially freeze your raw fat to help make it easier to mince
- You can use the cracklings (the left over pieces of fat) post-rendering (see below for recipes). If you’d like to this this, chop by hand rather than mince to stop them being too small.
- If your butcher/farmer has an electric mincer, you could ask them to pre-mince the fat for you!

Once your fat is chopped, Two distinct methods of rendering are common. Choose the one that suits you based on your needs:
The Dry Rendering Method
With dry rendering, the finely chopped fat is placed directly into a heavy pot, oven dish or slow cooker and heated gently without added water. As it melts, you pour off the liquid fat periodically before returning the in-progress fat pieces to the heat.
You can do this process in the oven (at around 104C/220F to 121C/250F) or in a slow cooker (including the Instant Pot on its slow cooker setting).
The rendering process should take around six to nine hours, depending on the size of the fat and the temperature of your heat source. Return to the pan every 60-90 minutes and pour off the liquid fat. When the cracklings are small, crisp and give up little fat, you are finished.
Check my full step-by-step guide to how to render lard in a slow cooker, which walks through the process in detail – its methods can be applied to an oven too.

The Wet Rendering Method
Wet rendering differs from the dry method in that you add a small amount of water to the pot that contains the fat. As it heats gently, the water prevents scorching and helps separate any impurities from the mix.
Just like dry rendering, this process can be done in the oven (with a lidded pot) or in a slow cooker (including the Instant Pot on its slow cooker setting) To wet render fat, pour half a cup of water into your pot, then add the chopped fat. Turn on the heat to between 104C/220F to 121C/250F and allow the fat to melt slowly.
Depending on the size of your fat pieces and the temperature of your heat source, this process may take six to nine hours. As the hours roll on, check the progress by looking at the size of the fat pieces – once they are much smaller (less than a third the size they were), strain off the liquid into a large bowl and allow it to cool. It will separate – the fat rising to the top and the water remaining at the bottom. Once cool, place the bowl in the fridge – here it will solidify into a firm, pale layer of fat above any remaining water.
One solid, lift off the layer of fat and turn it over. The bottom will potentially have impurities and some remains of the water clinging to it. Scrape this off so that you are left with a surface of clean, dry fat.
Should I dry or wet render?
I am often asked this question. Here are considerations to think about when deciding:
- Dry rendering has fewer stages – you don’t need to cool, refrigerate and then scrape the result. Wet rendering generally takes me two days, I can complete dry rendering in one.
- Dry rendering is better if you have ‘clean’ fat that isn’t dotted with pieces of meat still attached – as these would create impurities that would remain in the fat.
- With dry rendering, it’s easier to tell when the process is complete – the liquid you can pour off will reduce substantially.
- Wet rendering does not require you to return to the mixture every 60 – 90 minutes; you can turn it on and forget about it for at least four to six hours, and, when you get used to how long it takes for you, you could potentially leave it longer.
- Wet rendering is better if you have fat that is dotted with pieces of meat – the impurities will get moved to the water and discarded.
How To Know When It’s Done
There is no hard and fast rule for this. Every batch of fat is different; the size of the pieces makes a big difference and the temperature of your heat source impacts the timing too. As you render regularly you will begin to learn the cues and what works for you.
The biggest indicator is the size and colour of the fat pieces. As the fat renders, they will become smaller – potentially reducing to a third or a quarter of their original size. They will also, particularly with dry rendering, turn golden.
If you are dry rendering, the amount of liquid you can pour off in every check will decrease substantially. When I dry render, there is always a moment of diminishing returns – do not risk scorching the fat chasing the final spoonful!
Storing Rendered Fat
Well rendered fat should last well even left out on the counter.
But, after a decade of rendering fat, I still do not choose to leave mine on the counter. Why? Because rendering fat is a commitment of money, energy and time and even a small chance of it going bad is not something I want to happen!
When rendering day is done, I keep one container of lard or tallow in my fridge and freeze the rest. ‘Clean’ fat (fat in which you can’t see impurities – they will generally settle on the bottom of the container) will last two to three weeks in the fridge and many years in the freezer.
How to know if it’s gone bad
If you see mould on your fat, discard it. Other than that, it may go ‘rancid’ (off). You can judge this by the small – rancid fat smells unmistakably unpleasant — sharp and stale. I very rarely have fat go rancid, but if you’re in doubt, discard it.
Cooking With Rendered Fat
I use home-rendered fat in my kitchen many times a day. Here are my suggestions:
- Spread lard on bread and top it with salt
- Fry bread in lard or tallow
- Dot lard over a tray of vegetables, add some spices/herbs and then bake them in the oven
- Use lard in enriched-dough breads, in place of butter
- Use tallow or lard to fry vegetables, meat or pancakes
- Lard is great to grease bread baking tins, cake moulds, cookie sheets and gratin dishes
- Melt tallow and lard and, using a pastry brush, paint them over butternut squash slices before the oven
- Make Traditional Scottish Oatcakes using the traditional lard or tallow!
What to Do With the Leftover Solid Fat (Cracklings)
I love cracklings, viewing them a gift, not a by-product. Eat them warm with salt. Scatter them over soups or scrambled eggs. Fold them into bread. My Italian-inspired Pane con Ciccioli is a beautiful example of turning these small, crisp pieces into something celebratory.
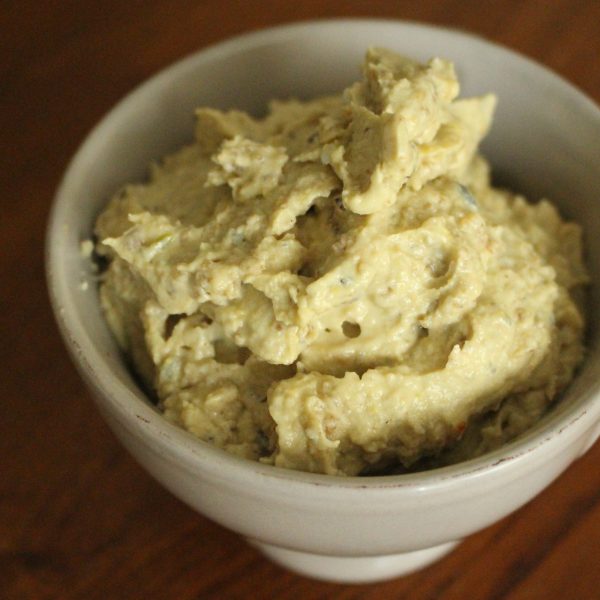
You can also make a delicious spread from them by checking my recipe: 7 ways to use lard (including a crackling spread recipe).
Frequently Asked Questions
What is the difference between suet and tallow?
Suet is the raw kidney fat from cattle or sheep. Once rendered and purified, it becomes tallow.
Can you use suet without rendering?
Yes, suet is traditionally used in British ‘puddings’ (steamed dishes) without rendering.
Why is some rendered fat yellow?
Fat can vary in colour. Beef fat is more yellow that pig fat. Grass-fed animals often produce yellower fat due to carotenoids in pasture. The breed and season also influence colour.
How long does rendered fat last?
Years in the freezer. Many months in the refrigerator. Room temperature storage depends entirely on cleanliness and dryness.
Can I render fat in a slow cooker?
Yes. A slow cooker provides steady, gentle heat and is an excellent tool for rendering lard or tallow.
If I want to use rendered fat in cosmetics/toiletries, how should I render it?
If you are planning to use your home-rendered fat in home-made toiletries or cosmetics, it’s best to wet render it. This method will help removed impurities better than dry rendering. Many people who wet-render for this purpose add salt to the fat/water mix (to pull our more impurities) and, once the finished fat has solidified, render it a second and even third time with more water/salt to cleanse it further.
Where can I get good-quality fat as an economical price?
The best place to start looking for good-quality fat is a local farmer. They may not be used to people wanting fat; tell them what you’d like, how much you’d like and what you’re going to use it for. If you don’t yet have a local farmer network and would like to build one, visit local farmers markets, talk to friends and ask at local shops.
Can I eat the fat off the top of my broth?
Yes. Broth, particularly beef broth, when cooled will be topped with a layer of fat. The easiest way to access this is to put your strained broth, still in the bowl, in the fridge. The top fat layer will harden and, the next day, you can carefully remove it. This fat will not last as long as ‘properly’ rendered fat (as it has impurities and liquid in it), but can be kept in the fridge for four to five days.
I save my drippings, isn’t this rendered fat?
Yes, it is. Any fat that drains from bacon, joints or burgers is technically rendered fat. Do scrape your pans after cooking – the fat is often infused with cooking ingredients (salt and herbs/spices) and it delicious. Keep it in the fridge and use it to spread on bread or fry some vegetables.
How can I learn more about rendering fat?
Ancestral Kitchen Podcast has an episode dedicated to rendering fat: How to Render Fat at Home (With Q&A)
If you’d like to know which fats I cook with and why, there is also this Ancestral Kitchen Podcast episode, The Fats We Love, The Fats We Leave
You might also like:
How To Render Lard in the Slow Cooker
7 Ways to Use Lard (Including a Lard Crackling Spread Recipe)
How To Make Lardo (Italian Cured Pig Fat) at Home
Bring ancient grain baking into your kitchen!
Download my free 30-page guide with five healthy and tasty 100% ancient grains recipes.