Have you ever roasted radishes?! Until today, I hadn’t. But here they are, with garlic and caraway seeds as per the recipe in Beyond the North Wind by @darra.goldstein
.
I gave my son one to eat whilst I was prepping them. He did not like it (very unusual for him!). After I’d done this to them, he asked for more 🙂
I get a horrid feeling any time I am faced with throwing away food. So, when my first lot of beet kvass was well-fermented and I decanted it, I just couldn’t consider throwing away the beets. Instead, I roasted them with some mushrooms, onions and courgettes.
.
And I am so glad I did! Talk about delicious. The kvass mix also had garlic, black pepper, coriander, cumin and caraway seeds. Those went in to the roasting dish with it. Their smell – along with that of the fermented beet – filled my little kitchen with an aroma that was totally new to me. .
.
I topped it with ricotta. And I topped the ricotta with black pepper, some zested lemon and a generous drizzle of olive oil.
.
Zero-waste tasting amazing.
Me with my boys in the room which is our cooking, eating, playing, sitting, reading and colouring space!
.
The big boy is Rob, my husband and twin flame. We’ve been together since 2008. He followed me to Italy a few months after we started our courtship and we’ve rarely been apart since. He’s washer-upper, sous chef #2, chief taster and the love of my life.
.
The little boy you’ve seen here before. He’s Gabriel, our 6 year-old son. He was born after doctor’s told us I’d never conceive naturally (which I didn’t believe) at home in water. He’s a bundle of joy, my greatest teacher, and has replaced Rob as sous chef #1.
.
These two are the only people that I’ve been able to share my culinary creations with over the last two and a half months. I am so grateful they are in my life. And I’m grateful I can share with you here, even if it is only virtually (for now…) 🙂
Soda bread anyone? Here’s my latest version: wholegrain, ancient grain – this time baked in a tin. And it’s nutrient-dense, by that I mean the flour has been given time to soak in the sour milk, removing the phytic acid that stops you digesting all the minerals.
.
Soda bread, made in this way, is this month’s #ancestralcookup. You can use any flour you like – wholemeal, white, wheat, gluten-free…whatever you can find, whatever your body loves. You can use whatever ‘milk’ you like – kefir, soured, oat, barley…whatever works for you.
.
I’d love to have you cook along and enjoy the super-delicious outcome. Link to the recipe is in my profile.
There’s pizza in my story today; this one! It’s wholegrain spelt sourdough topped with onions, lardo and herbs from the garden. My hubby made me smile by telling me it was the best pizza he’d ever tasted 🙂
.
Check out the story to watch it coming to life. My dough is mixed by a pro and we shoot it into a super hot oven using our new pizza-professional toy!
Very often the thing that stumps us as home sourdough bakers, in our quest to make brilliant bread, is our ambient temperature. The bacteria harnessed in sourdough breads and starters work well at warm temperatures and if we keep our living space cool, we”ll often struggle.
I have previously written an article How To Keep Your Sourdough Starter Warm which gives lots of ideas as to how to cosset a starter. Sometimes, despite trying all the easier methods (like an airing cupboard or a warm water bath) you aren’t able to get the results you need. This is where a proofing box can be heaven-sent. As well as giving you stable warmth to make creating a starter easier, it can also help you be in charge of your baking schedule – making sure you don’t have to get up at 3am because your dough is ready for the oven!
You can buy professional proofing boxes, but they are expensive and take up extra room in your kitchen. It is relatively easy to make your own, DIY, proofing box.
The simplest, non-thermostat, type is described in my earlier article linked above. They are of some help, but I have found a temperature-controlled set-up to be far more useful. And it’s not difficult, once you understand the electronics. I am a home-cook, and know next-to-nothing about electronics, but I’ve managed to get a grip on the ‘how’. I will describe it here in the simplest non-electrician language that I can. Please accept my apologies if you know what I’m talking about already. Please linger if you don’t – it’ll be worth it!
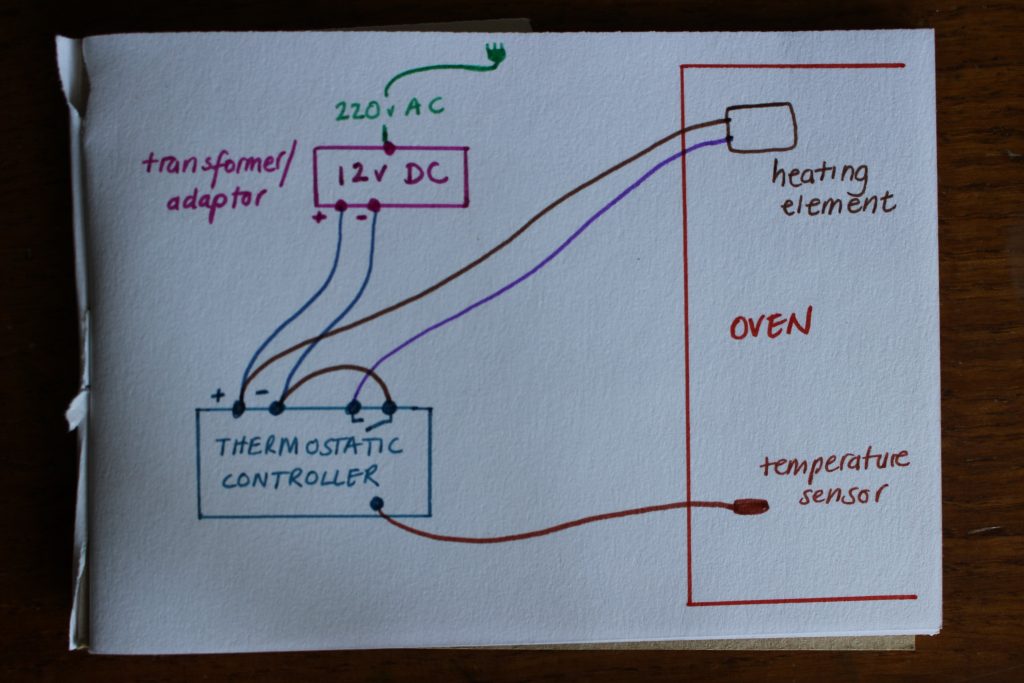
Here’s how to make a DIY proofing box with temperature control, to help you with achieving and maintaining a desired temperature whilst you are creating a sourdough starter or proofing sourdough bread dough.
The bits you’ll need:
A small insulated space
An AC/DC transformer
A heating element
A thermostatic controller (this has two parts, a controller and a probe)
A power cord and a plug, plus some DC cabling and connectors
Considerations/Options for the above:
Small insulated space
Options for this include a polystyrene box, or something along these lines constructed with foam packaging, a microwave (please be careful – these are not safe to dismantle), a toaster oven or even a standard oven. It need not still be working, but it does need to shut reasonably well.
AC/DC transformer
The AC/DC transformer you choose must convert to the DC appropriate to the thermostat and heating element you have chosen. Generally speaking in Europe this is going to mean 220 Volts AC to 12 Volts DC.
Heating element
This needs to be an appropriate output for the insulated space you want to heat. A 40 or 50-Watt heating element will be good for an average size microwave-sized space during northern-hemisphere spring and autumn temperatures. Increase the size of the space, or lower your ambient temperature and you’ll probably need a more powerful element.
Thermostatic controller
This is an LCD display showing the temperature inside your proofing box and allowing you to set it to what you desire. The controller then switches the heating element on and off automatically in order to maintain that temperature. The best way to explain how to choose a thermostatic controller is by showing an example of the components we used.
An example of the components we used:
Our heating element’s power rating is 48 Watts and it runs on a 12 Volt power supply. Our thermostatic controller runs on a 12 Volt power supply and can work using a current of up to 10 Amps. Also our transformer can supply up to 10 Amps at 12 Volts.
The formula:
Here it is in plain English so you can just match the numbers up and do the sums.
Power (Watts) = Current (Amps) * Potential (Volts)
For our heating element:
Potential (Volts) = 12 Volts
Power (Watts) = 48 Watts
Therefore, substituting the values we have into the equation:
48 = Current (Amps) * 12
Current (Amps) = 48 / 12 = 4 Amps
Since our thermostatic controller can handle up to 10 Amps we are safe! And our transformer can supply up to 10 Amps also so that’s sufficient. These are the figures you’ll need to look at on the component specifications – then insert them into the equation above.
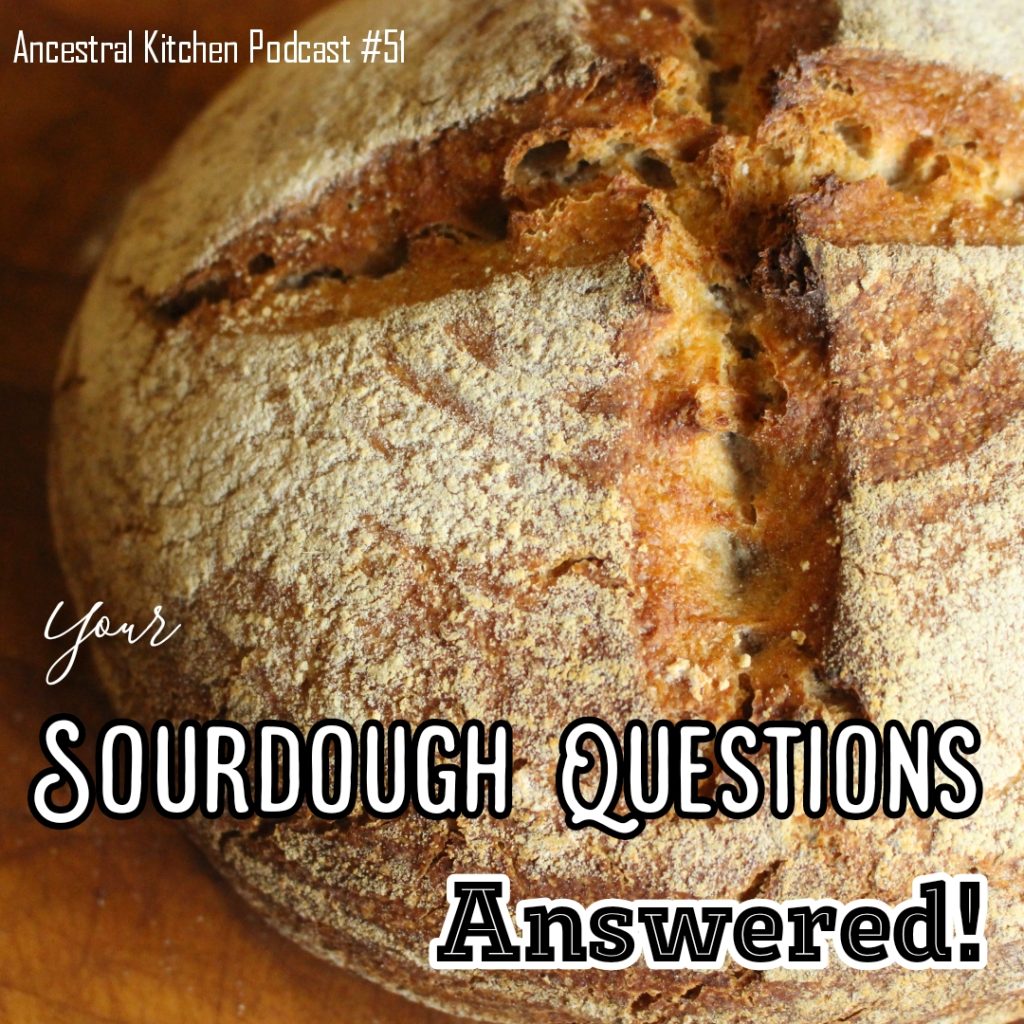
Click on the picture to listen to a podcast episode dedicated to the sourdough questions I receive!
So what should I do?
Choose a heating element with an appropriate power rating as described above.
Choose an AC/DC transformer with an appropriate input voltage for your geographical region and an appropriate output volage for your heating element.
Choose a thermostatic controller with the same operating voltage as the first two components and then put the power rating in Watts plus the operating voltage of the heating element into the equation above. Provided the optimum current (Amps) of the heating element does not exceed the maximum current of the thermostatic controller or the AC/DC transformer then you are all set!
Build it – there is an example of the circuit and a picture of our set up below. It is helpful to use DC cabling and connectors between components to avoid things short-circuiting.
Here’s a diagram of the circuit:
Here’s what our set up looks like:
Here are the parts we used, from Amazon – the products may not be available from the same sellers in your part of the world (or may not be available any more in these listings), but you can use the specifications here to familiarise yourself with what you need.
1/ The power supply has two sets of outputs and we’re currently using a large oven as our proofing space! Therefore in winter I have set one of the power supply outputs permanently to power a 50W heater and the other to power the thermostatic controller which powers another heater. The first heater (on all the time) can usually keep the oven in the low 20s degrees C while the second tops it up to whatever we set it to (ie 25C or 28C).
2/ Heat-shrinkable plastic tubes are available – they protect the joins between cables and components much better than electrical tape does. Here’s a photo of these being used on our set up:
Very often the thing that stumps us as home sourdough bakers, in our quest to make brilliant bread, is our ambient temperature. The bacteria harnessed in sourdough breads and starters work well at warm temperatures and if we keep our … Read More
When you make bread kvass this is your starter – left over rye sourdough. I made my first lot of this fermented drink around 2 months ago and am still using the same bread I started with.
.
When it’s ready (i.e. sour enough for me), I drain the fermented liquid and decant it into a swing-top bottle to fizz up in a second ferment, then I remake a sugar/water solution to add the bread back into.
.
I think this re-using of bread could go on indefinitely, like water kefir or milk kefir grains do. (And now I’m wondering if somewhere, someone has decade old bits of rye bread that they are still using in kvass?!!)
.
I often flavour my swing-top bottle second ferment with fresh mint from the garden. Sometimes, I’ll add a few raisins to get it really bubbly.
You do not need to make sourdough in order to get the all the benefits of fermented grains. Here’s farro monococco (‘little’ spelt – the grains are tiny!) which I soaked, sprouted and blended. I added a little sourdough starter before I whizzed them up; this is optional, if you don’t have it you could use kefir (milk or water), whey or nothing. Leave the mix at room temp to ferment.
.
From there you can use it in many ways. Get a pan really hot and make it into pancakes. Add some water and make a porridge. Pour it into a greased baking tray and oven yourself a flat bread.
.
We’re having this bubbly spelt as pancakes tonight, along with eggs and some fresh asparagus.
I drink a cup of freshly-ground green coffee most mornings.
.
It began when my hubby started roasting his own coffee. I was sad I couldn’t join in…there was no way; I just cannot handle ‘normal’ coffee. Despite being, according to 23andme, a fast caffeine metaboliser, I literally do not sleep after having coffee and it makes me feels shaky. There’s more to roasted coffee than just caffeine, me thinks.
.
And then I heard @bengreenfieldfitness talking about green coffee. So I tried grinding then steeping the beans. I liked it. I felt good. My sleep didn’t seem affected.
.
I’ve honed it a lot since them. I use organic, arabica beans. They are lower in caffeine than varieties such as robusta and also not as hard (I’ve broken a few grinders on this adventure!) I boil then simmer 2 tsp of the ground beans for 10 minutes.
.
I drink it mainly for pleasure. I have read that the harder you roast a coffee the higher the caffeine is. I have also read that green coffee has other compounds in it that help mitigate any caffeine. I do know there are many anti-oxidant and anti-inflammatory compounds in the green stuff!
.
My hubby still roasts his own beans, in our cast iron pan. I can’t convert him ;-).
I have tried baking a lot of different scones. Hands down soda bread scones are my favourite. The dense texture and particular flavour of soda bread lends itself amazingly to these little bundles of treat.
.
Want to cook them along with me this month? It’s easy. You can do them wheat, ancient grain, spelt, gluten-free – whatever flour you like. You can use raw dairy like I did here, or one of the many milk alternatives out there.
.
The template recipe is linked to in my profile – it’s the Ancestral Cook Up for this month; ‘nutrient-dense soda bread’. It’ll walk you through what you need to do.
.
And I’d recommend topping them with coconut oil and peanut butter. Sometimes it’s just darn necessary!


 Bean-to-Bar Chocolate (with no special equipment!)