
Don’t you just love soda bread? It’s density, its moreishness, its cakiness, its simplicity. The only downside, in the past, for me, was that the flour wasn’t pre-fermented or pre-soaked, and I know that means less nutrients available for my body. So I set myself to making soda bread ancestrally and this is what I came up with. This recipe is designed to give you a easy, hearty, tasty loaf, made whilst also ensuring you get the most possible nutrients from the flour that you use.
The only hard and fast ingredients in this bread are flour, salt, baking soda and an acidic liquid. We all have different tastes, we all have access to different ingredients: take my template for this bread and make it work for your kitchen.
A bit about this type of bread:
Soda bread is made without yeast. It harnesses the reaction between baking soda and an acidic liquid. This produces carbon dioxide which causes the bread to rise.
Soda bread was first cooked by American Indians who used the acidic pearl ash, but it’s usually associated with Ireland, where it became popular in the 1830s because it is inexpensive, easy-to-make and works with lower-gluten flour. It was traditionally made with soft wheat flour, baking soda, soured milk and salt.
Ancestral cooking specifies that we treat grain products with a special process before cooking them. This is because grains, and grain products like flour, carry phytic acid. Phytic acid blocks absorption of minerals. So, to deactivate the phytic acid, and make the bread nutrient-dense, we need to add another step to the ‘normal’ way of making soda bread.
So how can we cook soda bread ancestrally?
In order to deactivate the phytic acid in the flour we use, we need to soak it in an acidic liquid. Handily, the liquid component of soda bread is acidic – so lends itself to this process nicely. To make nutrient-dense, ancestral soda bread, we mix our acidic liquid into our flour the night before we want to bake, leave it to sit, and then finish off the mix and bake it in the morning.
Ingredients:
500g flour
1 tsp baking soda
c. 350-400g sour milk/kefir/buttermilk
1 1/2 tsp salt
optional: 1 tsp runny honey
herbs, spices and flavourings
Flour
I’m passionate about wholegrain baking and, if you can get it, I’d recommend using 100% wholegrain flour. A soda bread is a great place to start with wholegrain, if you haven’t before, because the baking powder-induced rising makes it easier to work with.
What no wheat?
This is also a great space to experiment with alternative grains to wheat. I’m thinking of spelt, kamut, rye, or gluten-free grains such as buckwheat. If you fancy dipping your toes in a new flour but aren’t sure, trying using it for 25-50% of the loaf.
What’s your local grain economy?
When we are used to shopping for staples in the supermarket, we often don’t realise there’s another world of passionate grain producers right under our nose. Take a look close to your home. Can you get to a nearby produce store and see if there is local flour on the shelves? Is your town’s farmers’ market still running? What about if you search for farms and/or mills near by using Google?
Liquid
Soda bread is traditionally made with some form of acidic dairy. It is the acid in the liquid that reacts with the baking powder and causes the bread to rise. Here are some options:
Sour milk
I sour unpasteurised milk by leaving it in a clean, covered container, for 2-5 days. Naturally-present bacteria lacto-ferment the milk, preserving it, making it easier to digest and filling it with probiotics.
This was a routine process for our raw dairy-eating ancestors and is still regularly practised in traditional cultures. I don’t recommend doing it with pasteurised milk – if you need to use pasteurised milk in the bread look at one of the other options below, or sour it the ‘quick’ way (which will not include any probiotic goodness) by adding a a tablespoon of vinegar or lemon juice to it.
Kefir
Raw milk kefir is preferable, but you can also kefir pasteurised milk at home or even buy milk kefir in the shops.
Buttermilk
Shop-bought buttermilk is generally low-fat pasteurised milk that has had lactic-acid bacteria added to it to culture it. You can also buy the culture and make your own.
Non-dairy options
If you cannot tolerate dairy, you can use milk alternatives. The important thing is that it is acidic. The best way to do this is by using milk kefir grains to ‘kefir’ the milk substitute. I have done this successfully with coconut and oat milk. The alternative is to ‘quick’ sour it by adding a tablespoon of vinegar or lemon juice.
The amount of liquid needed will depend on the flour that you use – that’s why I have only given an estimated amount. Wholegrain flour soaks up more liquid than white flour and different grains hydrate in different ways. I’ll describe what it should look/feel like in the process section below, so you know what to expect.
Herbs, Spices and other flavourings
Soda bread pairs with herbs, fresh or dried, very well. My favourite combination is nigella seeds, oregano and rosemary. I use a teaspoon of each. I’ve also experimented with garlic, thyme and parsley to good effect. Really though, the bread is a blank canvas for you to paint with your herbed-up imagination!
I’ve yet to try spices in a savoury version but I’m imagining the vivid yellow colour of tumeric in the bread! If you want to give it a go, I’d love to hear what you choose and how it turns out.
And then, there’s the option of sweet soda bread or soda scones – which I’ll talk about below. Skip to the bottom if you’re getting excited about the thought of a soda bread scone already 😉
The process:
Making nutrient-dense soda bread has 2 simple stages:
The night before the bake: Mix the flour with most of the acidic liquid.
The morning of the bake: Add the remaining ingredients, mix and bake.
So, if you want to eat bread on Saturday, you’ll need to mix the flour and soaking liquid Friday night.
Here’s the process:
The night before the bake:
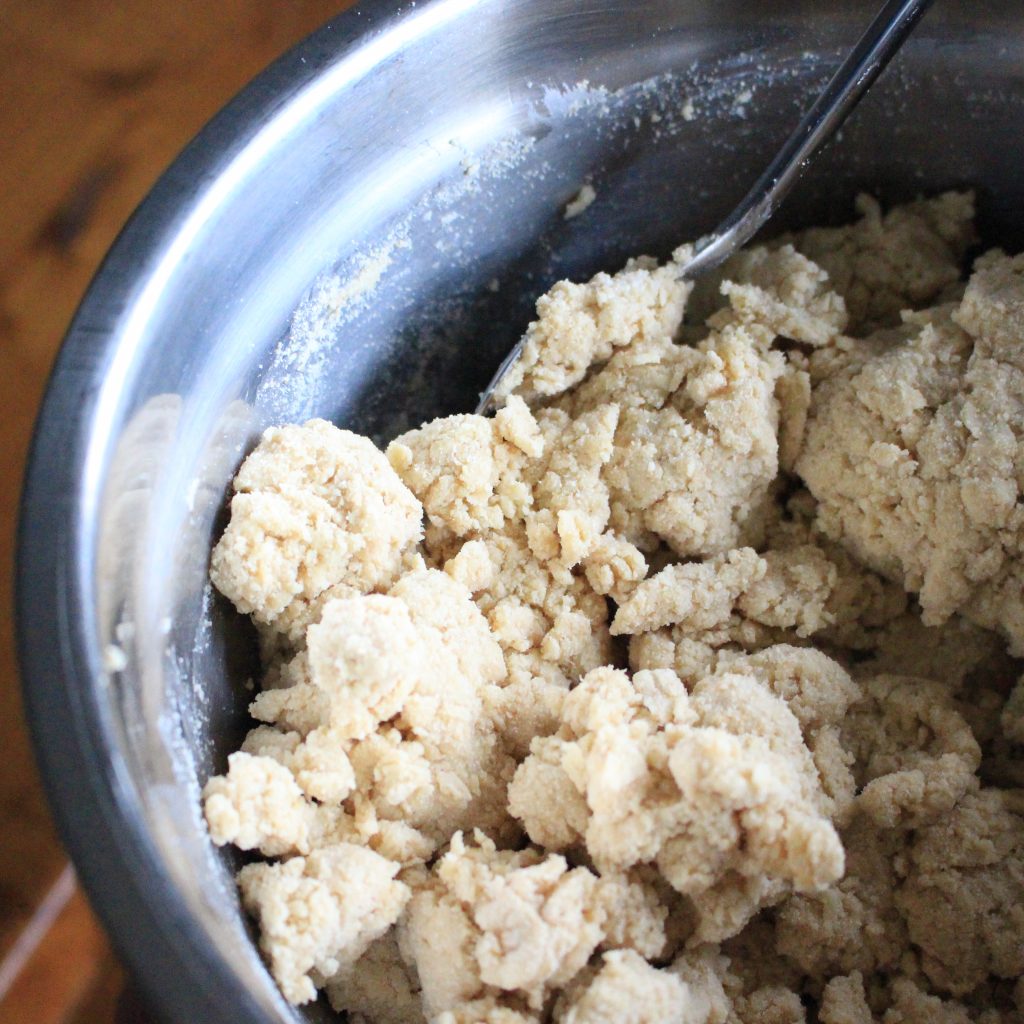
Measure out the flour into the bowl and add virtually all of the sour milk (or alternative) to allow you to coat all of the flour with it. For me, this ends up being 350ml of liquid, with 20ml reserved for the following morning. Your mixture should come together loosely, so that you can no longer see a layer of dry flour at the bottom of the bowl as you mix, but not be so wet that is becomes the texture of a standard bread dough. Cover the bowl with a damp tea towel and set aside.
Here’s a picture of what I mean:
The morning of the bake:
Preheat your oven to 180C/350F or a little lower if you have a fan oven.
Mix together the baking powder, salt, reserved sour milk (or alternative), honey and flavourings. When well combined, add them to the flour/milk mix from the following evening and work together with your hands until the new ingredients are well-distributed.
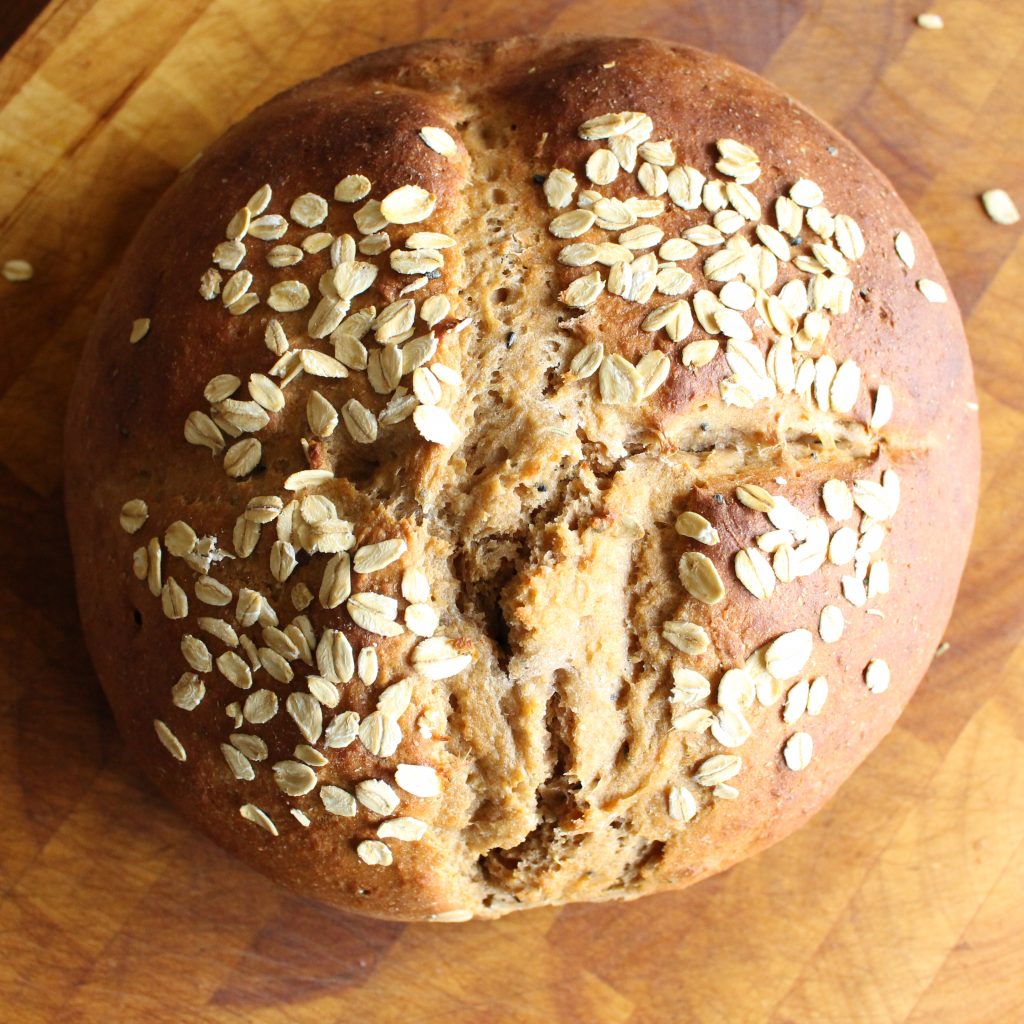
Shape the bread into a loaf and place onto a greased baking sheet. Traditionally, soda bread was round, scored with a large cross across the top. Due to the long soaking of this dough, it is often quite soft and can therefore flatten in the oven. If you want to help avoid this, pop the bread into a small greased loaf tin.
Tent the loaf with aluminium foil. You’ll remove this after 20 minutes in the oven but it will keep the top moist for the first half of the bake – lessening the chances of the loaf bursting and creating a large seam along the bottom.
Place the loaf in the oven to bake. After 20 minutes, remove the foil. Check after 35 minutes – you’re looking for a golden brown top and a hollow sound if you thump the bottom of the loaf. Return to the oven if not ready. I usually find it takes between 35 and 45 minutes. Leave to cool on a wire rack.
Soda Bread Scones
The first time I made this bread, I knew I had to try it as scones. The texture is perfect. I’ve been fixated on sultana and lemon zest (to which I added an extra teaspoon of honey) but I can just as well imagine savoury scones with cheese.
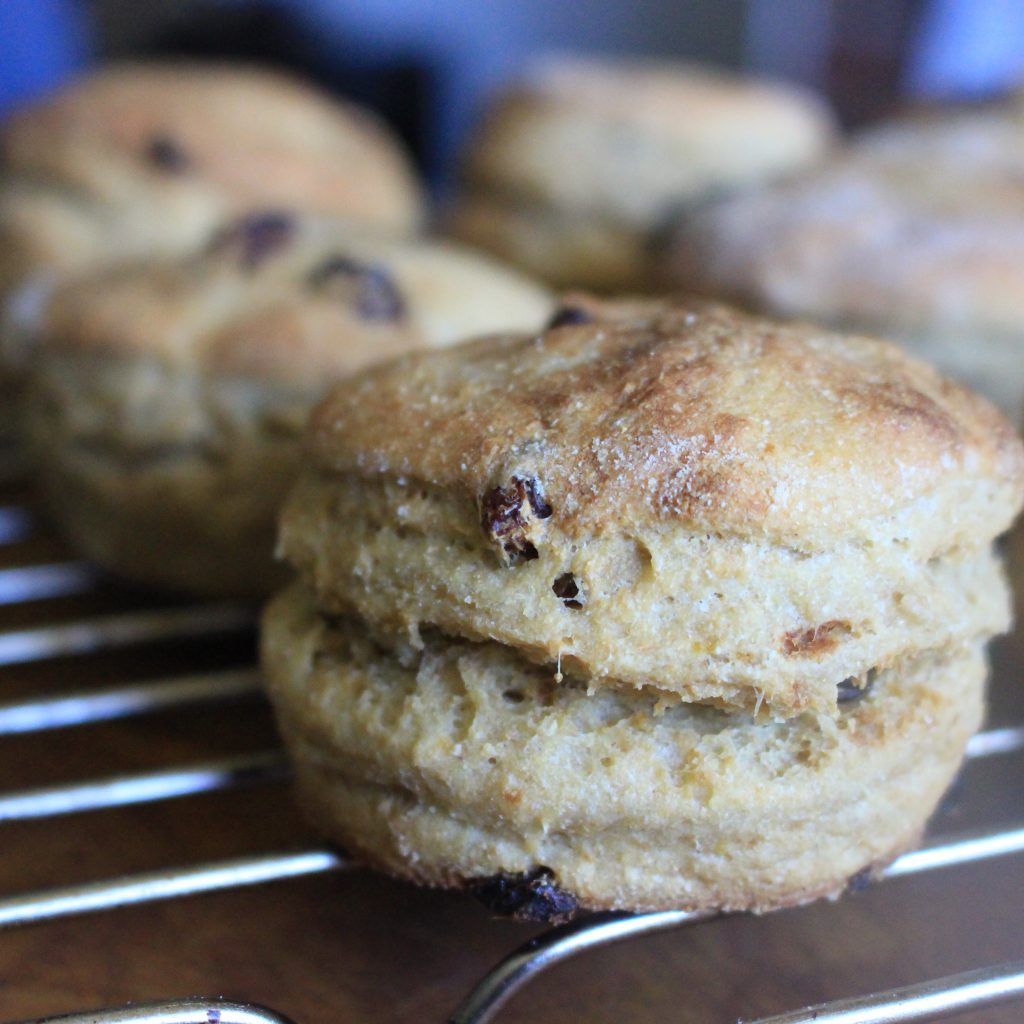
The process for making scones is the same as for the bread above, but at the shaping stage, flatten the dough to 2/3cm on a floured board and use a cutter to create the scones. Put them onto a floured baking tray and cook at 170C/340ishF for 25-35 minutes. Again you are looking for a golden brown top and a hollow sounding bottom.
Sharing it:
I want to see and hear about your process: your ingredients and why you chose them, how you’re cooking them, the finished bread, how you eat it and who you share it with. I’ll be posting pictures on Instagram @ancestral_kitchen and on my blog. If you’re on instagram, post using the hashtag #ancestralcookup and tag me (@ancestral_kitchen). If you don’t have instagram, please do comment at the bottom of my blog post – you can upload your pictures there too.
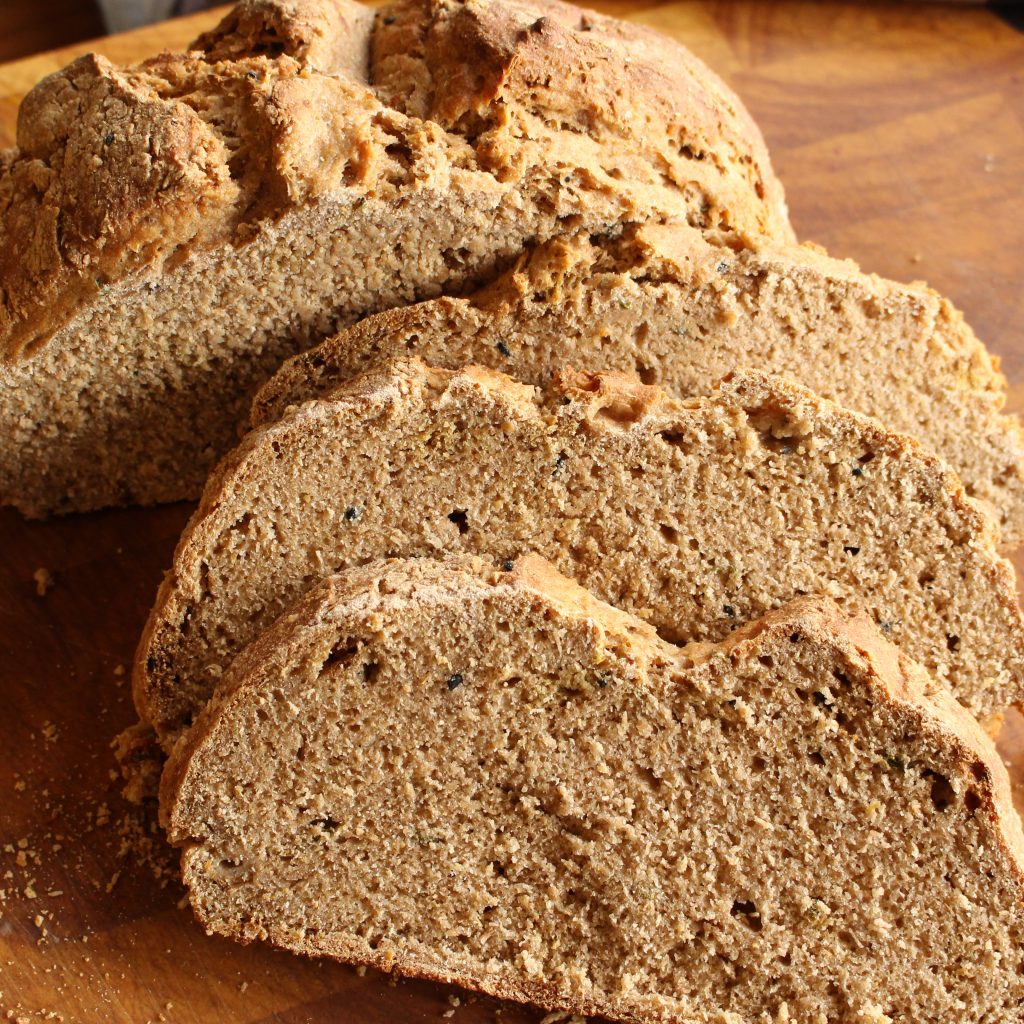
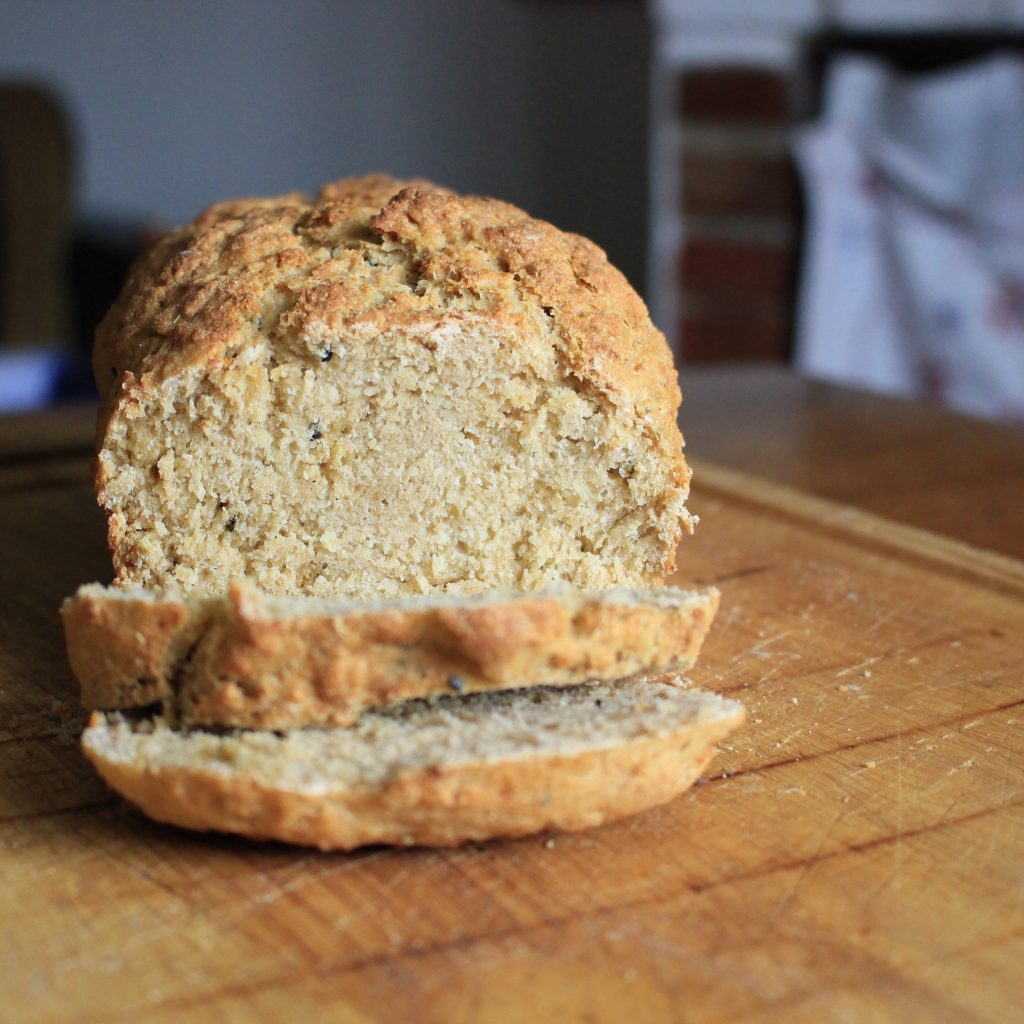
@lvtrevino on Instagram made the soda bread with wholemeal spelt flour and home make milk kefir. She sent me this picture.
And here is @lvtrevino on Instagram’s spelt and kefir Nutrient-Dense Soda Bread sliced. Here’s what she said: “Thank you so much for the recipe. I shared it with my Mum and she is going to make it too. I loved it!”
I’m excited to see this recipe! I’m going to try it this weekend. I remember eating soda bread on vacation in Ireland many years ago!
Great! Let me know how it goes 🙂